In spring 2025, my dear friend Katryne MacKim was offered a vigil to contemplate joining the Order of the Pelican. For non-SCA friends, it is a peerage – analogous to knighthood – for excellence and impact in service. It is both a high honor and a responsibility.
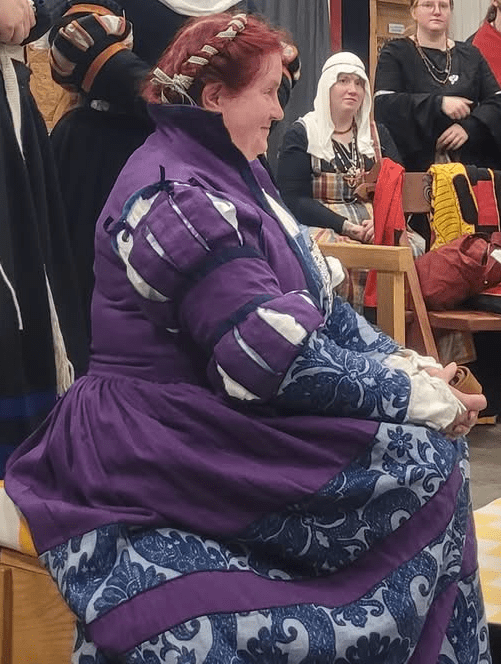
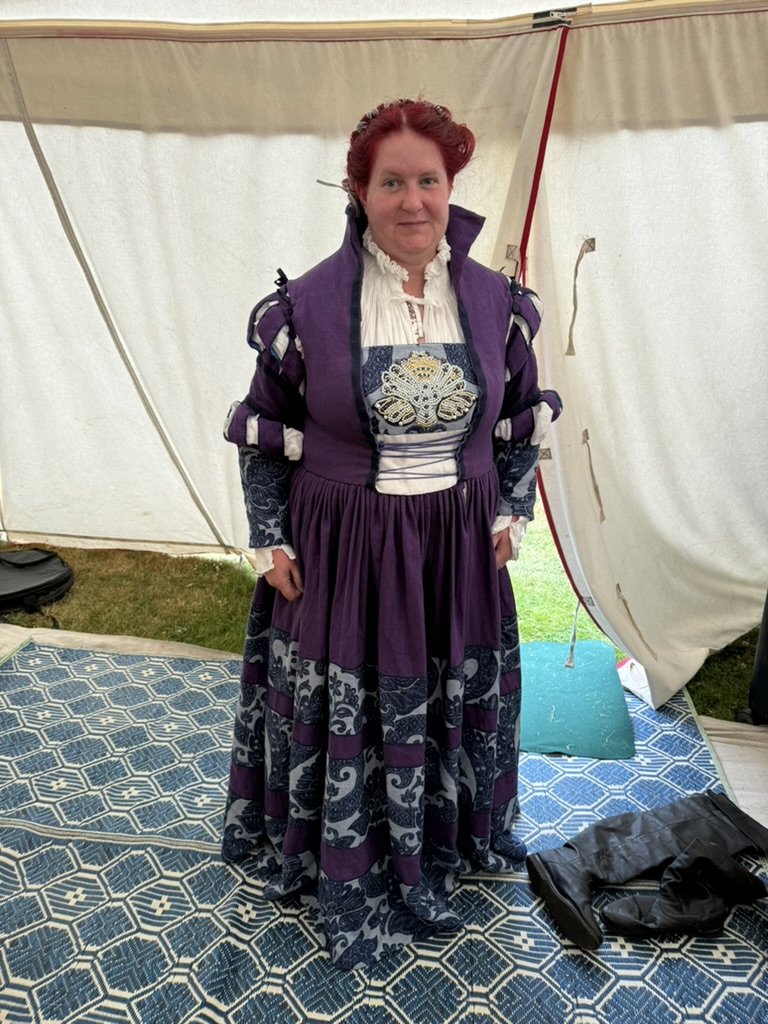
While Kate’s original persona was 16th century Scottish, her husband wears German, and she’s started making and wearing colorful German trossfrau garb as well. We decided on a Saxon gown, from around 1505-1550, for a high-status gown with lots of color and character. Kate and I worked together on it so she could learn about the construction and finishing from me, and my amazing friend Aryana took on embellishing and pearling the brustfleck.
Fabric
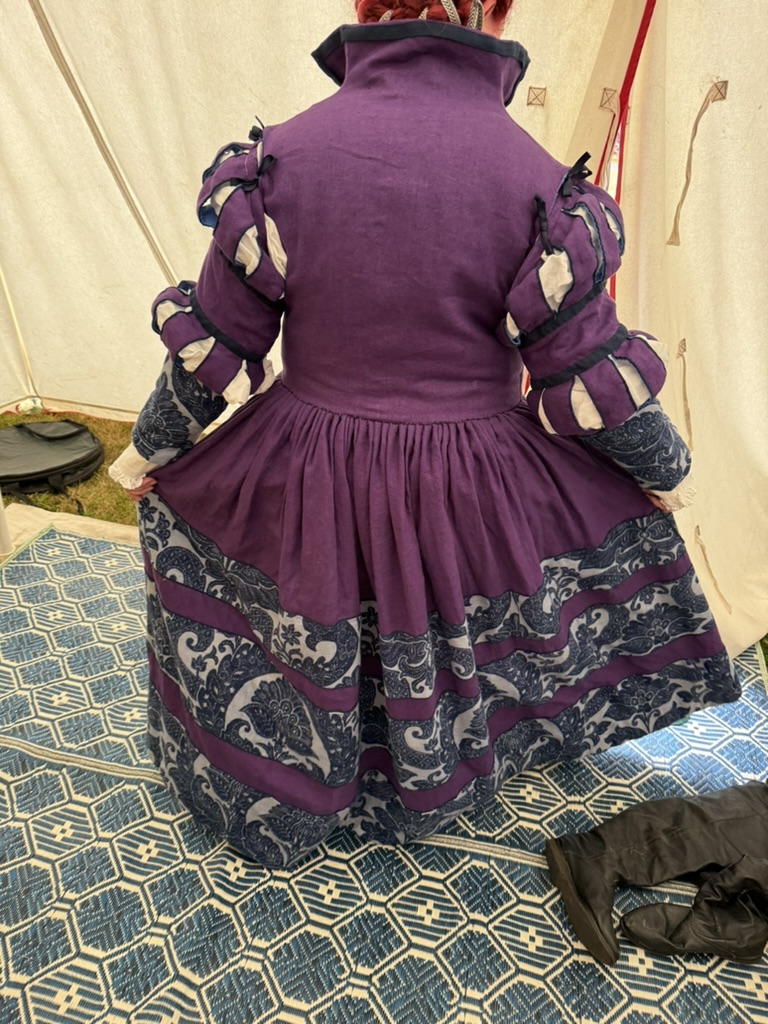
Since her elevation was planned for late June in central An Tir, in the Seattle area, she chose linen fabric for warm weather comfort and wearability. (A trossfrau dress would generally have been made from wool, and a court gown from silks and velvets.) She also made a special request for purple and blue, as the elevation would be on her wedding anniversary, and she and her husband wore that same color combination colors to celebrate their wedding.
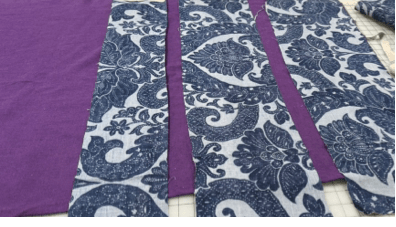
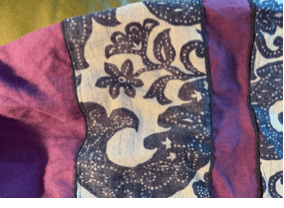
What other purple could be better suited than fabrics-store’s Majesty purple? And for guards, she chose a navy and light blue linen damask, inspired by another friend’s dress. These are not typical Saxon gown colors, and I loved that uniqueness for her!
Style
As I have mentioned in a previous Saxon gown project, I tend to think of German gowns as kind of a paper doll assemblage – choose a bodice from one portrait, sleeves from another, and possibly a skirt from a third!
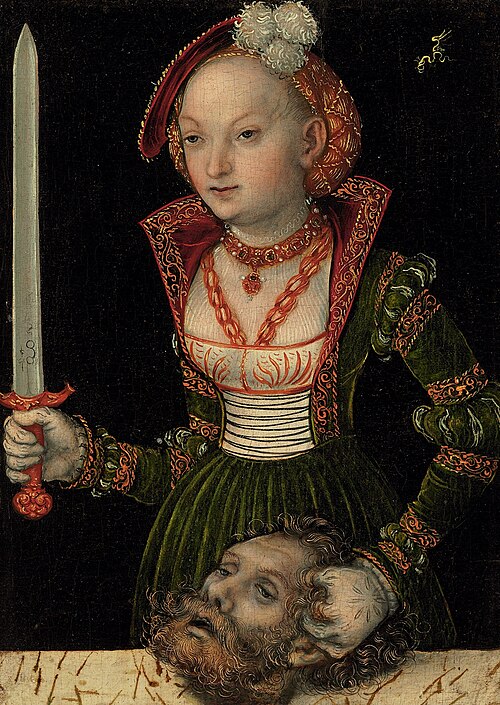
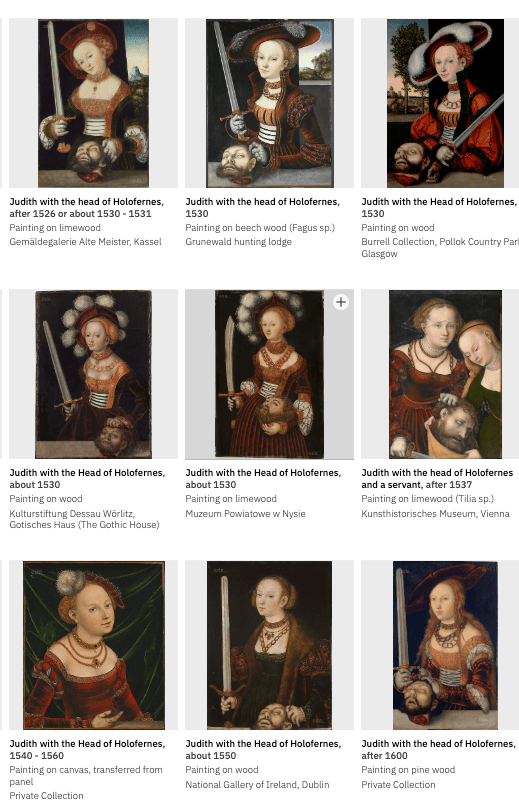
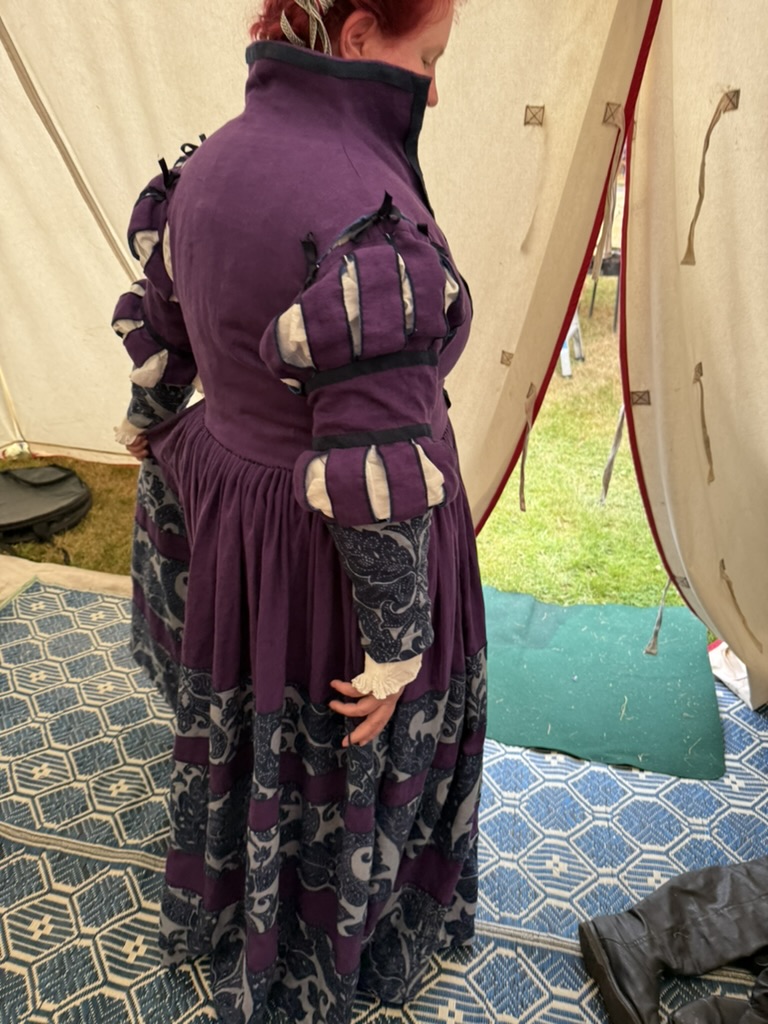
For the sleeves, we chose the look of Lucas Cranach’s the Elder’s Judith, from 1545. (Which one, you might ask? He painted that subject matter several times with variations of model, dress, details, and background.) This one lives within a private collection, but is documented in the Cranach digital archive
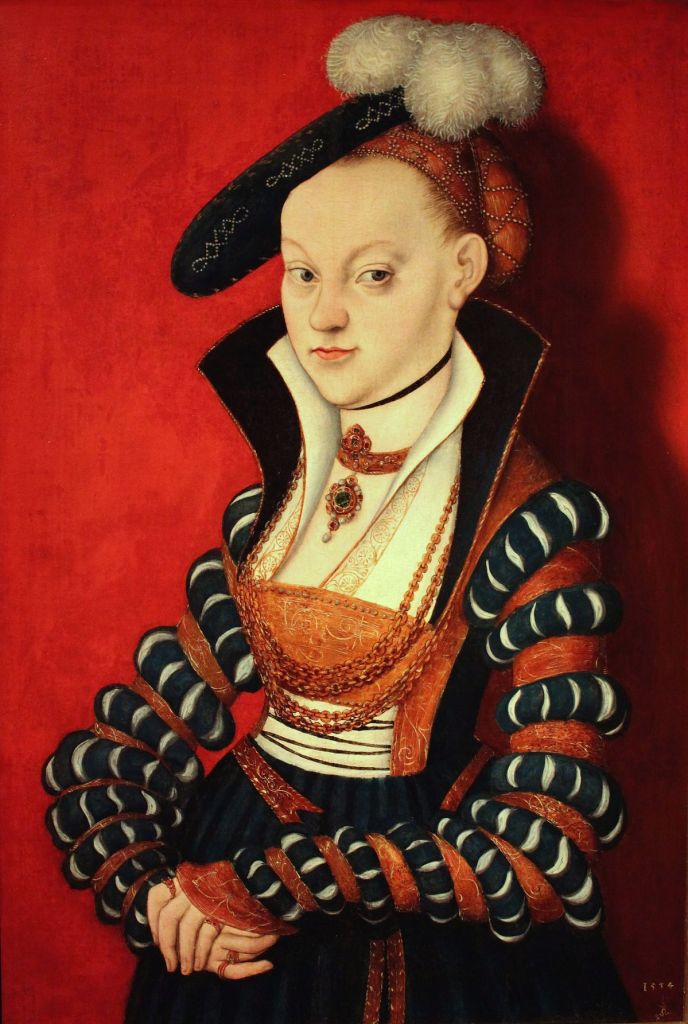
We chose the very tall “evil queen” collar of Cranach’s Portrait of Christiane von Eulenau, 1534, as well as the solid brustfleck/stomacher.
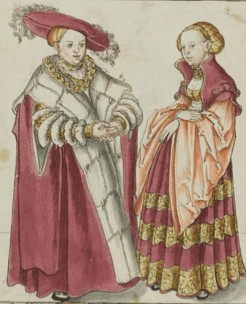
Another tall collar with similar triple guards on the skirt, detail from Christine of Saxony, sketched by the Cranach workshop in Der Sachsische Stammbuch in 1546.
Rabbit Hole!
The story of Judith and Holofernes is an apocryphal book from the 1st or 2nd century BCE. It tells the story of Judith, a beautiful, brave, and pious widow, and Holofernes, general of the Assyrian invasion of Israel. The Assyrians worshipped Nebuchadnezzar, so a victory would require the Israelites to abandon their Jewish faith. Judith’s town of Bethulia had been under siege for thirty days, and town leaders requested five additional days for God to save them.
Judith, unhappy with the inaction of the town’s leaders, made her own plans to defeat the invaders. She prayed that God would send fury on the heads of the enemy, give her a strong hand and deceitful lips, and crush the arrogance of the enemy by the hand of a woman.
Judith dressed seductively to entice the eyes of men, and she and her maidservant entered the camp of the enemy. She told the Assyrians that she could provide Holofernes with a true report of Israeli plans and gained an audience with him.
Holofernes invited Judith to a banquet in his tent, where he drank until he passed out. Judith took his sword and beheaded him, and she and her maid placed the head in a food bag, left the enemy camp, and returned to their village. She was hailed as a heroine by her town, and her action changed the course of the war.
There are multiple theories behind the paintings. Lucas Cranach the Elder was a friend of Martin Luther, and the paintings could be an allegory for the powerful Catholic church and its young and valiant Protestant adversaries. They could also be a caution about the power of women, with their ability to deceive and seduce.
Regardless, Cranach was obsessed with this story for a significant period of time, and he and his workshop painted a representation of Judith and Holofernes at least 18 times in 10 years.
Design Decisions
As always, with a complicated gown, I talked through design options with Kate, since Saxon gown construction is mostly conjecture, and this gown needs to be modernly wearable without domestic staff.
The first compromise was linen fabric, as we discussed above.
We decided on tie-on sleeves, as a compromise for warm weather wear, but I did emphasize to Kate that there really is no evidence of a Saxon gown being worn without sleeves.
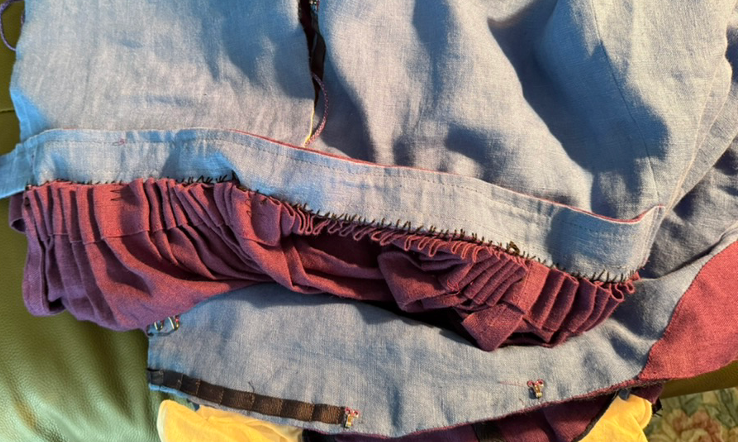
We decided on a slightly complicated waistline construction, with cartridge pleating, to give the bodice appearance of a historical Saxon gown with modern hook-and-eye wearability.
Kate did not want a super snug middle and waistband, as she doesn’t find that comfortable.
We decided on a pleated collar and cuff hemd, vs an embroidered shirt – and I had the honor of lending my hemd to Kate.
I worked on the bodice and sleeves, while Kate worked on the skirt – and she did a most excellent and precise job on the guards and hems!
Bodice
As always, I drafted a pattern, and we made a couple of mockup iterations to make sure we had the bodice fit exactly as we wanted it.
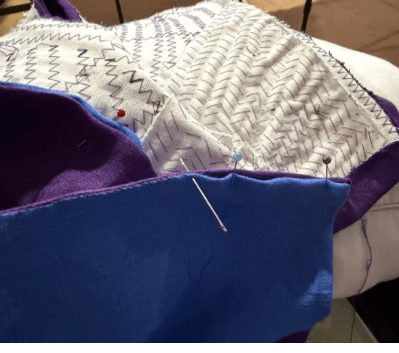
For the bodice, I started with a cotton canvas shell, trimmed to seam allowance at the outer edges. For a graceful tall collar, we needed to do pad stitching to shape the bodice.
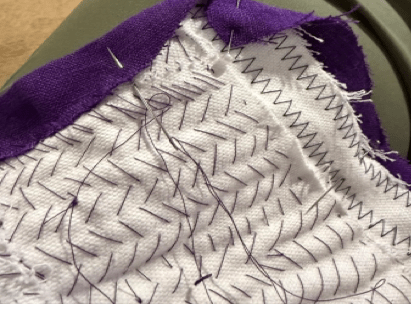
I have learned that pad stitching for simple layer-based structure can be done via machine zigzag much more quickly, and in a way that saves my handsewing capacity for the parts that really require it. I machine stitched a second canvas strip on the center spine and the edges at center front.
Then I added a second layer of canvas, reinforcing the shoulders and the collar – machine stitching where we wanted flat structure, and pad-stitching the collar curve in through the neck. I added a third layer in over the collar and neck, and a fourth, center strip reinforcing from mid shoulder to edge of collar. All these layers made for a bulletproof and beautifully shaped tall collar (and also resulted in a noticeable case of trigger finger, a repetitive stress injury, on my right ring finger).
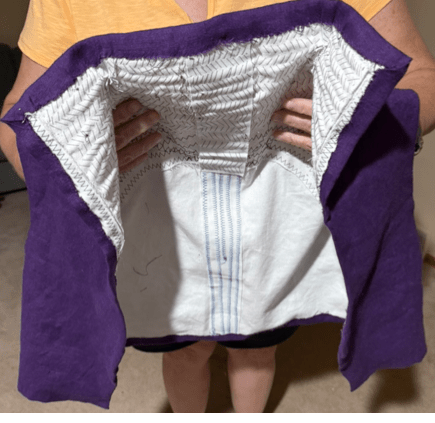
I stitched up the purple linen bodice shell, and whip stitched it into place wrapping around the edges of the pad-stitched canvas interlining.
I then installed the cobalt blue lining, whip stitching that in place at the outer edges and tacking it together through all layers at the seams.
Kate tried on the bodice and we measured and marked the lacing section and the brustfleck edges. For lacing anything that will take some stress during wear, I’m a huge fan of ladder lacing using a ¼” grosgrain ribbon. (I’m pretty sure this isn’t medieval or renaissance, but also pretty sure it will be more durable than any other lacing option.) I marked measurements on the lining side of the front edges, and pinned and stitched the grosgrain ribbon down through all layers at ¾” intervals.
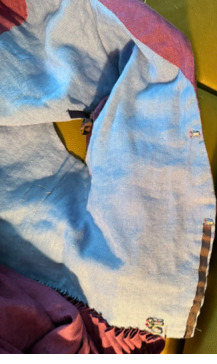
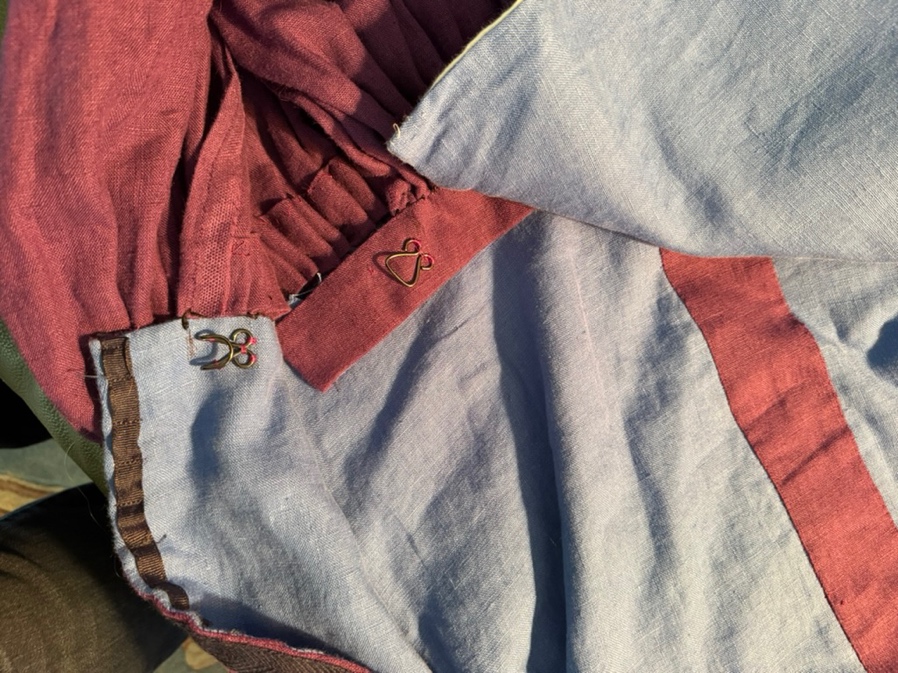
I also added a large, sturdy hook on one side of the front bodice, for a matching eye to be added later. I also added small hooks on the inside edges to secure the stomacher and brustfleck. These need to be marked with the garment on the wearer, as the way the curves lie can be tricky, and they may need to be adjusted for ideal fit. Finally, I edged the front and collar with ½” navy wool twill, whip stitched in place, which hid the stitching securing the grosgrain ribbon.
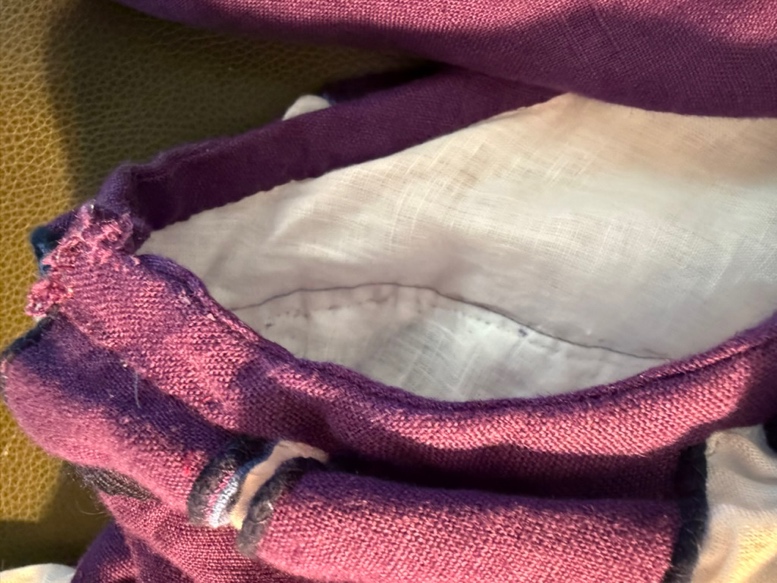
Note that we decided to line the inside of the standing collar, where it would show, in matching purple vs. contrasting cobalt – you can see the edges in the below photo. Either option is fine, and it is entirely up to the wearer.
Brustfleck
Embellishing the brustfleck is a special art form – I’m glad Aryana is willing to take it on, and her work is marvellous! I’m not sure I have the patience for large amounts of pearling and beading.
We again chose to combine the brustfleck with a solid white stomacher, which would show behind the lacing, but NOT be the transparent fabric of the chemise. The single piece stomacher construction helps solve another construction problem which I’ll dive into more deeply below.
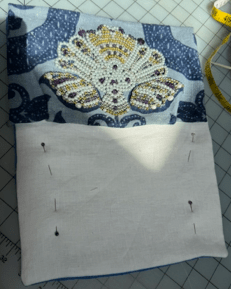
I started with double layer canvas interlining. I tried pleating the edges to create a curve but it didn’t lay nicely over the bustline – we pulled that back out and went with a flat stomacher construction. Pearls and beads are heavy, so we carefully concealed structural stitching through the canvas and the pearled section of the damask to create a sturdy stomacher – if a little top heavy.
I then added a white linen front piece, and whip stitched a cobalt blue linen lining behind the whole thing. Isn’t that pearling/beading glorious?
Now we come to the construction question I mentioned earlier. I look at the waistline of a portrait in a Saxon gown (where it’s not concealed by the wearer’s arms) and I see the white lacing section transitioning directly to the skirt pleats with no waistband.
I’m not quite sure how they accomplished the movable nature of front lacing with the stability needed to support a pleated skirt, but I have a few ideas. What I chose to try with this dress is creating a waistband section that was attached to the right side of the bodice front and cross the abdomen and extend behind the left side, installing an eye to meet the pre-installed hook on the left side of the bodice front.
That provides a sturdy edge all the way around the garment to cartridge pleat the skirt to.
We then slid the stomacher behind the lacing and bodice edges, but in front of the waistband, to achieve the look. I initially set up hooks and eyes to hold the stomacher in place, but ended up basting it down as it was easier to get dressed, and could still be removed for laundering.
Sleeves
When I made my trossfrau dress, I chose to build a sleeve behind which I could use my own hemd for poufing through the panes. When we made the queen’s Saxon gown, we chose to make a stable sleeve in layers, sewn together. We neglected to document that – but I have the photos to do so for this project. The initial overview of this approach, by the way, is on Meisterinne Genoveva’s website.
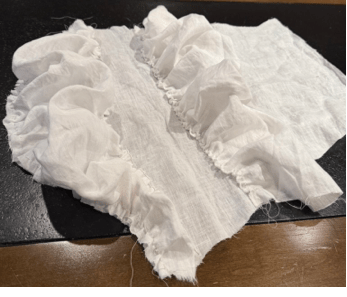
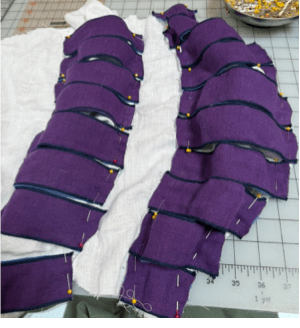
We started with a white linen base layer, basting together a simple sleeve pattern that fits comfortably, plenty of ease to move, but not overly loose. I then had the wearer try it on, and marked the ‘bands’ of the sleeve – the poufs and panes, the solid sections, the cuffs.
I pulled the basting back out and laid the sleeve out flat. I cut a strip of white linen 2x as wide and as long as the band I was adding a pouf to. I basted down the edge just inside the seam allowance, then gathered and basted the pouf in place across the sleeve, both bottom and top pieces, just outside the marked edge so the basting and raw edges would be covered by my solid band. I could have measured, pre-gathered, and matched up – but honestly this is an art, not a science.
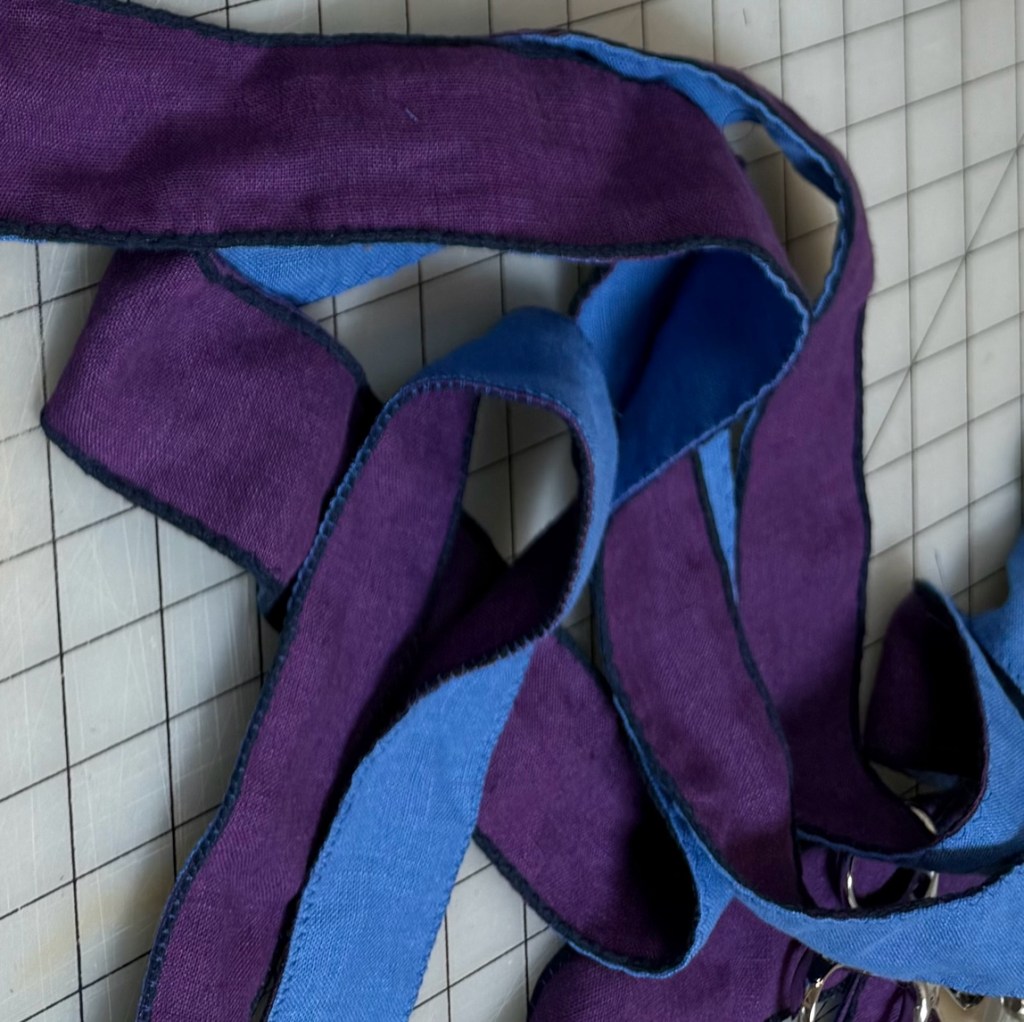
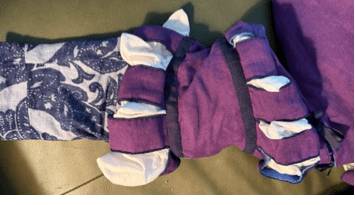
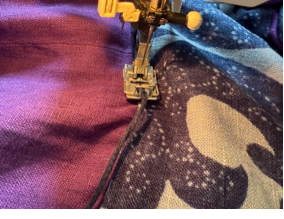
Then I made strips for the panes. I cut strips and made tubes the full width of my fabric – I chose to have cobalt lining and purple facing outward, but all one color is fine, too. I sewed them up, pulled them inside out (I use a scrap ribbon that I baste or safety pin down at the starting edge), and pressed them flat. The goal was 2″ panes. I chose to couch cotton cording (same cording we used for front lacing) to the edge of the strips, using a couching foot and machine zigzag. It gave the panes a little extra body and stiffness to hold a curve over the poufs.
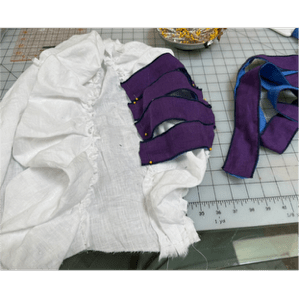
Starting in the middle of your sleeve, I cut a length of pane off as I proceeded into a strip that would curve out nicely. I pinned them in place until I completed the width of the sleeve, then basted them down.
The panes may not come out evenly – the edges were going to be at the seam inside the arm, so I was able to shift and taper strips accordingly.
I machine sewed the long sleeve seams together, pouf sides inside, matching up the edges of the poufs. Then I measured and cut solid bands, leaving room for seam allowance, which I pressed under. I whip stitched in place, neatly covering and tacking down the raw edges of the panes and poufs. Then I whip stitched wool twill tape bands over the band edges, for a contrast finish. Note that I would have used the damask for the bicep band too, but we had just enough for the forearms and no more
I hemmed the cuffs, and bound and finished the top edge with bias strips cut from the purple linen. Since we were tying on the sleeves, I stitched 3×20” pieces of wool twill, folded in half lengthwise, into the seam allowance, evenly spaced across the sleeve head to tie the sleeve onto the bodice. We then tried on the bodice, and marked the tie anchors on the bodice, and stitched solid rings to the inside of the bodice sleeve edge. Both the rings and the stitching should be very sturdy and substantial – these rings can bear a lot of stress.
Skirt
Then, on to the skirt – which Kate worked on. She carefully measured and marked pacing with a clear quilting grid. She machine sewed the top of the guard to the skirt from the inside, good side to good side, and then pressed the guard flat and pressed under the bottom edge. She thoroughly pinned the free edge to the skirt, and stitched it in place slowly and carefully – it’s easy for long straight strip guards to creep as you go, and create puckers or even pleats, and nobody wants that.
I decided to couch the edge of the guards with matching cord, since it goes really quickly with a cording foot and would create a nice finish and drape for the skirt.
After we carefully measured bodice bottom to ground length, Kate pressed and blind hemmed both the bottom and the top edge of the skirt – with a slightly wider hem at the top edge, to support cartridge pleating.
Kate then measured and marked gathering intervals, sewed two parallel gathering cords, and cartridge pleated the skirt to the bottom of the bodice and the waistband section. She left an opening at the front right to match the hook and eye. She used heavy duty thread, and did a double pass on her stitching for sturdiness. For more information on cartridge pleating, try this site.
The Final Dress
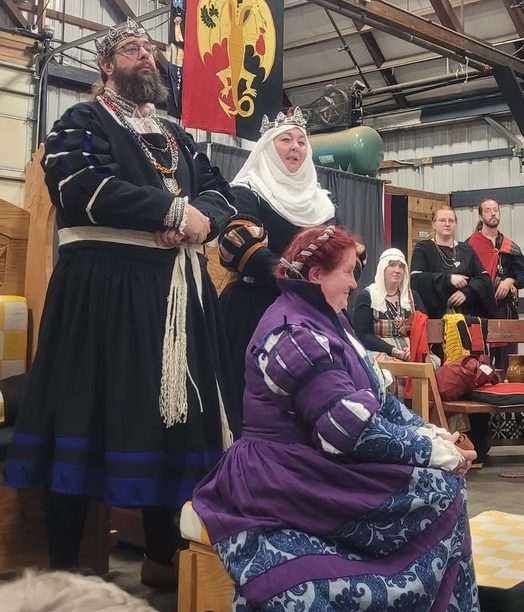
Kate wore this dress for her elevation at June Faire, and she looked gorgeous. It fit beautifully, wore well, and was very comfortable.
Next Steps
This time was my second time making a Saxon gown. We were both happy with the outcome – beautiful, comfortable, easy to wear, and with historical fit and proportions.
The only next step is to someday make one for myself. I tend to a slightly earlier period, so wearing a Saxon dress has never been an urgent goal.

 House Snark