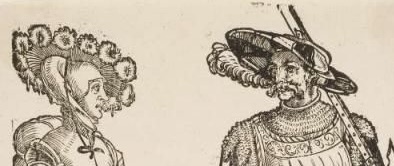
The tellerbarret is an iconic large landsknecht hat worn during the late 15th and early 16th century. It’s generally large, flat, and both highly visible and useful for sun shade (and possibly rain shelter).
There are countless images of tellerbarrets in woodcut prints of the period. They were worn by both women and men. Some are adorned with many ostrich plumes (featherwork is a fascinating side quest for me) and some are embellished with slashing and dangling jewelry. A few examples are festooned with silk woven through slashes or made of wrapped or pieced fabric.
While tellerbarrets were originally created and worn by landsknechte and trossfrauen, the hats made their way into renaissance society and were even worn with court clothing. Ornately befeathered and adorned hats indicated higher status and wealth.
Tellerbarrets often had a tie of some sort to hold the hat in place, and both men and women usually wore them atop a haube or coif of some sort.
Theories about Construction
Tellerbarrets consist of a large flat brim, a relatively flat, shallow hat crown of some sort, and occasionally an extended sweatband that helps hold the hat in place on the head.
The large brim has multiple options for construction, based on the visual record. Occasionally the brim seems to be stiff and very flat, but other brims seem a little flexible and show a slightly curved line at the edge. Some brims seem to be split and secured in place with a button or stitch, some brims seem to be flat and covered with a single piece of fabric top and bottom, and some seem to be gathered into the center and secured in place by the sweatband.
Split Brim Examples:

Young Woman Stepping into a Brook, ~1521, Urs Graf
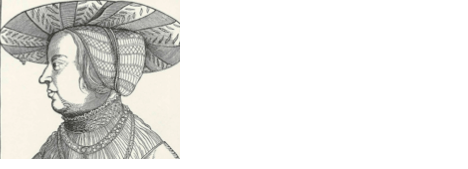
Anna of Bohemia and Hungary, Nuremberg, 1528, by Hanns Güldenmund
Flat Brim Examples:

Zum Tanz schreitendes Paar, ~1531, Hans Sebald Beham
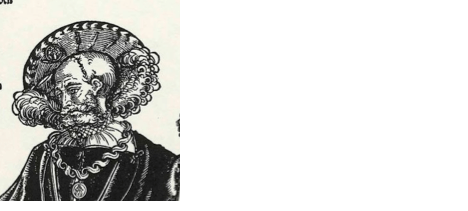
Feldarzt und Gehilfe, 16th ct, Erhard Schön

Ulrich von Ulm Barchant Weber, ~1530, Nuremberg, Niklas Stoer
Gathered Brim Examples:

Der Landsknecht Steffan Goldschmidt, c. 1535, Peter Flötner

Landsknecht and his Wife, ~1530, Hans Schäufelein
Crown of the Tellerbarret
There’s relatively little visual record of the construction of the crown, but both square, folded crowns and round, soft crowns can be found in occasional woodcut prints. The below include both a tellerbarret and a schlappe (starfish hat).

Landsknecht cleaning the barrel of his fire-arm, ~1525-1530, Hans Burgkmair the Elder
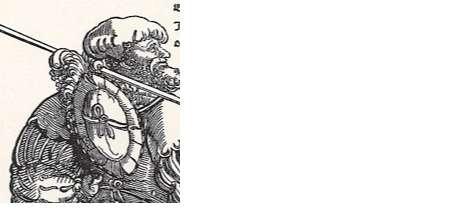
Schuster als Landsknecht, ~1538, Niklas Stör
Experiments in Construction
I started with an excellent construction resource I found online, linked below, originating from a German landsknecht fahnlein forum. The forum is no longer online, but the PDF has persisted in other storage locations.
https://www.flickr.com/photos/77086627@N00/413774279/
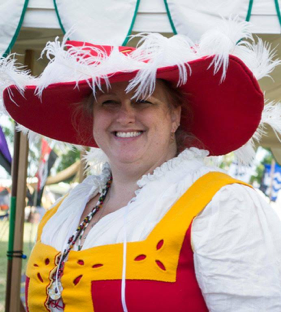
Hat #1 – Floppy Hat
This is the first tellerbarret I made, in 2015, using the instructions from the above link. I used canvas, three twisted jewelry wires, red wool, and 12 ostrich feathers. It made for a realistically floppy brim that wasn’t particularly durable over time.
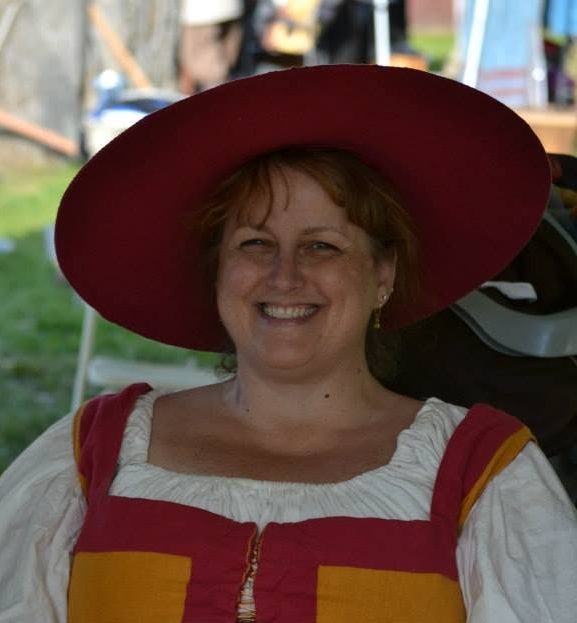
Hat #2 – Hair on Fire
This is the second tellerbarret I made, using a 19” stiff brass macrame ring, canvas, and linen. I added bright yellow ostrich plumes to the hat after this photo was taken, giving it the “hair on fire” look, by using stitching and hot glue. This hat was durable but the feathers were prone to coming off.
Hat #3 – Pride Hat
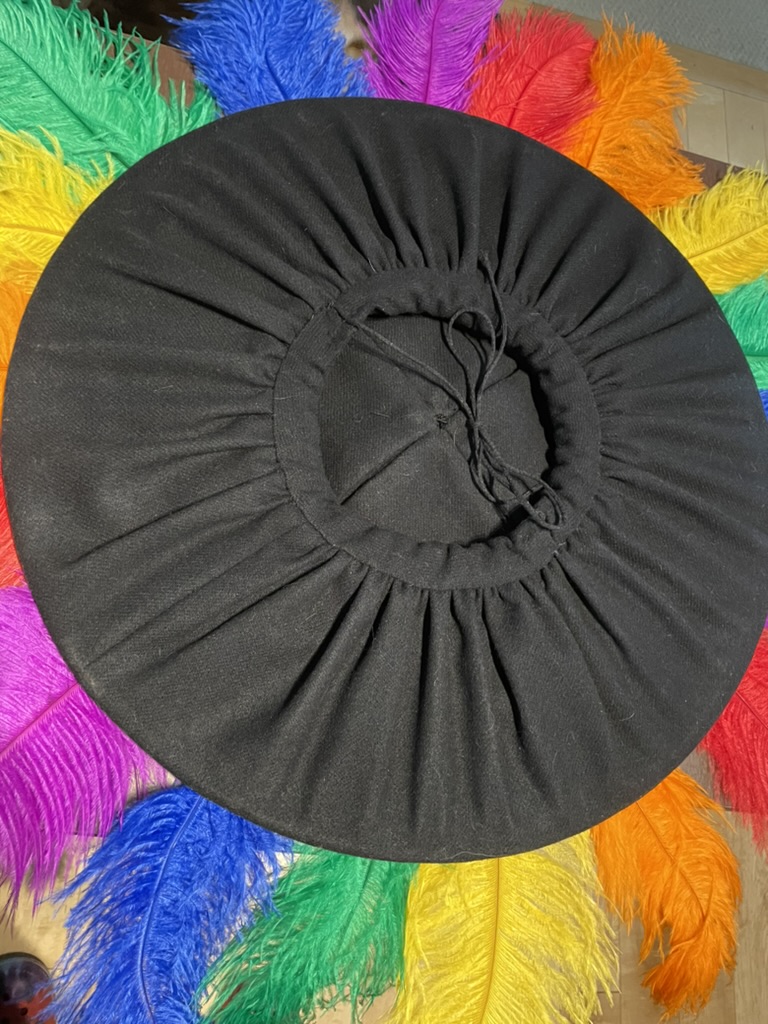
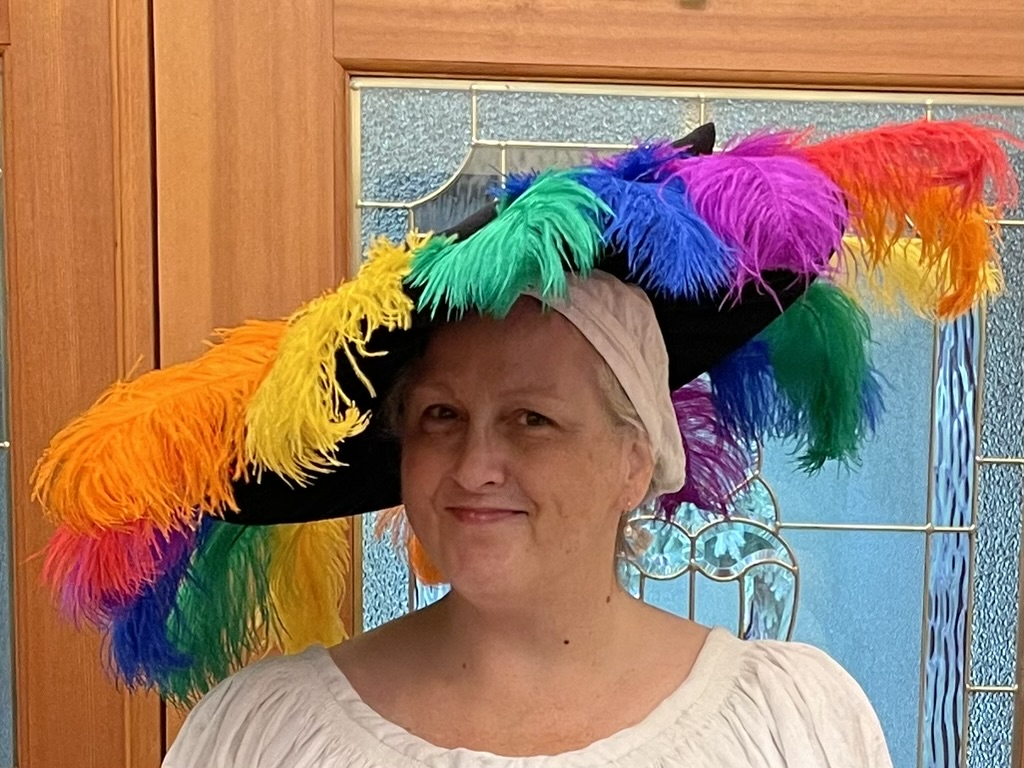
This hat was made for the An Tir peers’ auction, and is the first hat for which I have process photos. It’s made of a 19” brass macrame ring, cotton canvas, white glue, black wool, and 18 x 16” rainbow ostrich feathers.
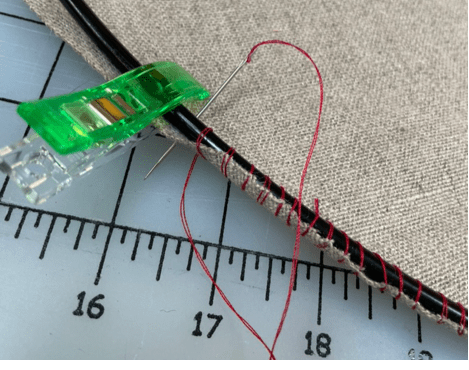
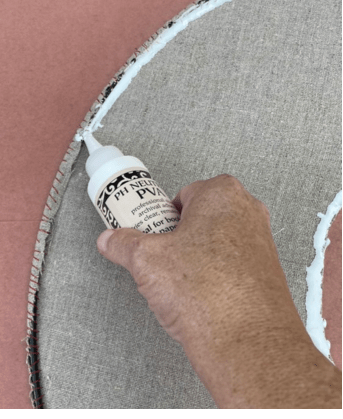
I started with the brass macrame ring, and whip stitched and glued the canvas base to the ring. I edged the inside of the ring with bias tape, and then traced that oval opening to the center of the square box i was using for the crown.
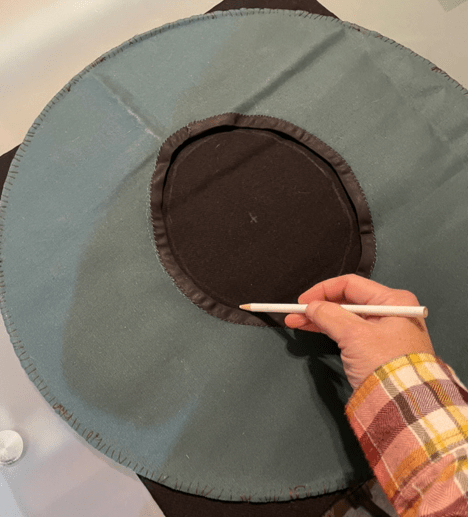
I cut a large rectangle of the black wool, as long as the circumference of the ring, and as wide as 2x the width of the canvas base + 1″. I sewed the ends together, making a large ring, folded it in half, and secured it to the canvas base down the center fold. Using silk embroidery cord and about 3/8″ stitch length, I gathered the center tightly so that it was flush against the inside edge of the canvas base.
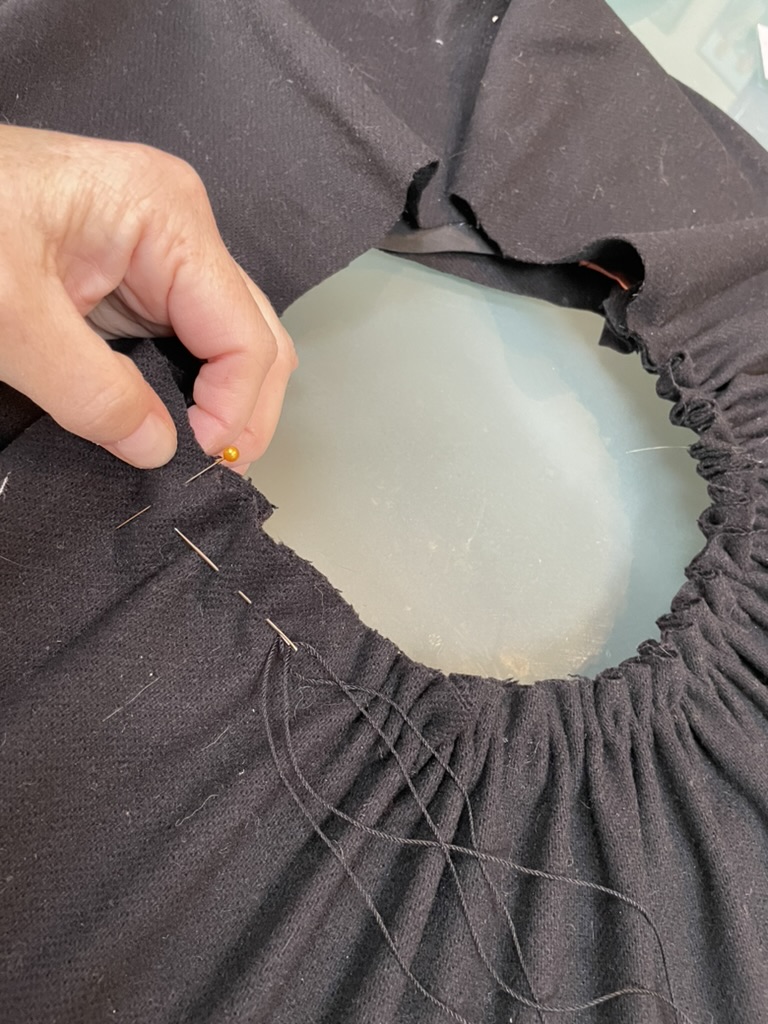
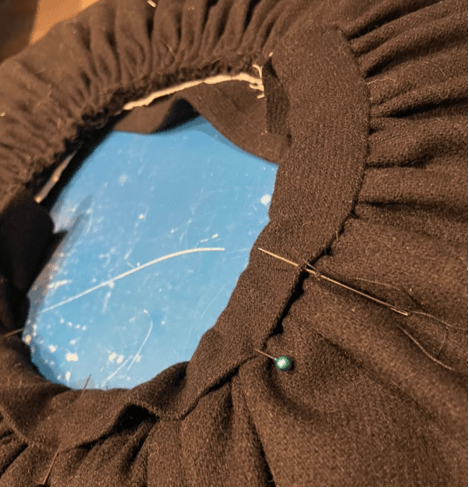
I cut a 2 1/2″ bias tape of the wool, pressed the edges down. I then basted the crown box to the top of the gathered brim, and whip stitched the bias tape through the crown box, the brim, and the bias tape.
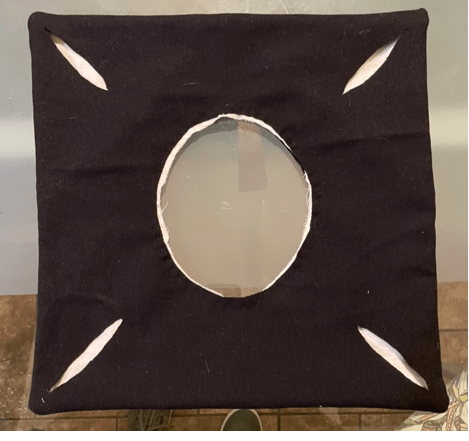
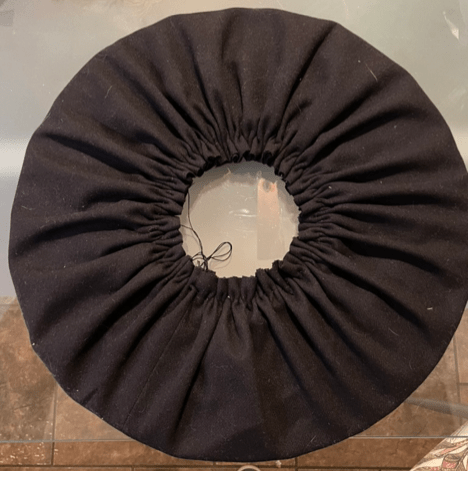
I folded the bias tape through to the bottom of the hat, and whip stitched that edge in place to the gathered brim.
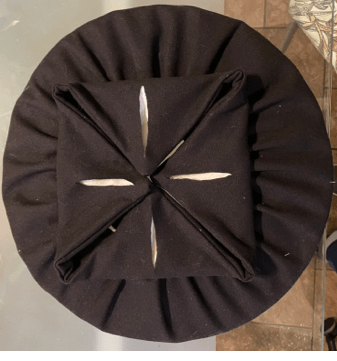
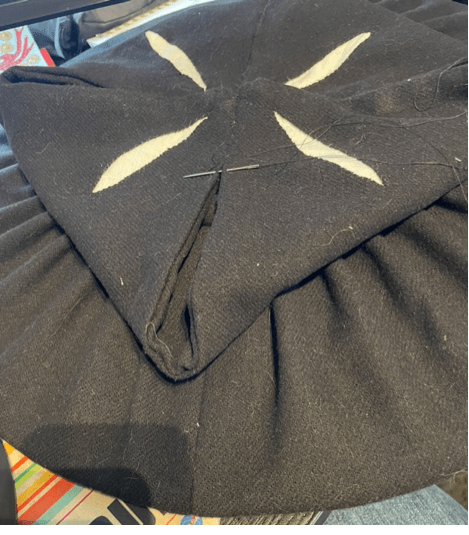
I closed the brim box and whip stitched the edges together to close it. I added a large cloth button to the center as a finishing touch.
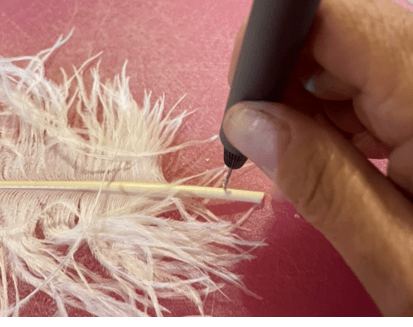
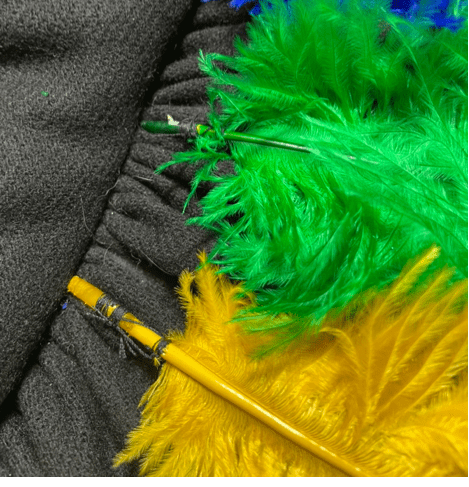
I attached the feathers using an adaptation of a method I found on a re-enactor’s website- I drilled two tiny holes in each feather rachis about an inch apart, using a pin drill, and then stitched them to the hat by using a figure 8 stitch.
Hat #4 – Mantle of Madrone Hat
This hat was made as an award token, and I wanted it to be extra. It’s made of a 22” brass macrame ring, linen canvas, white glue, dark red wool, striped and rainbow grosgrain ribbon to show through slashing, and 24 x 20-22” black and white ostrich feathers. I used the same method as above for securing feathers to the hat, which has proven to be quite durable.
The hat below was my inspiration:
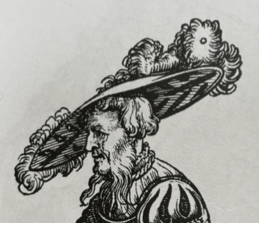
Two Landsknechts playing at dice, ~1525–1530, Jörg Breu I.
I first attempted a split brim, using millinery wire, but wasn’t able to put together a sufficiently sturdy hat brim.
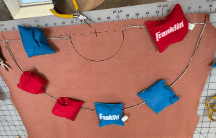
Then I returned to my sturdy standard, the macrame ring, this time in a 22” diameter. I whipstitched and glued the ring to the canvas.
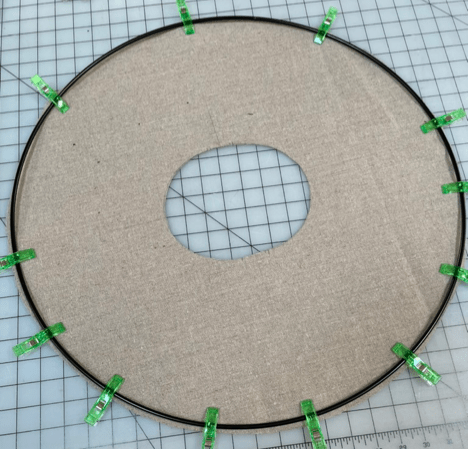
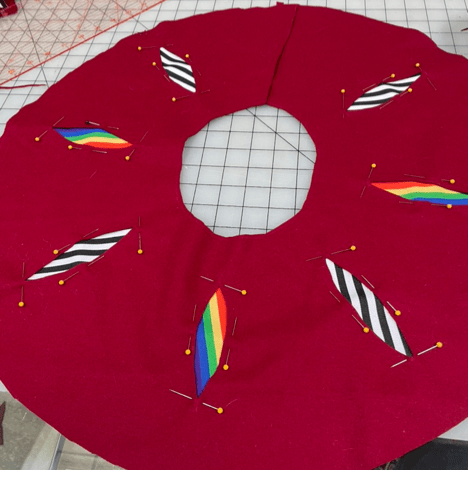
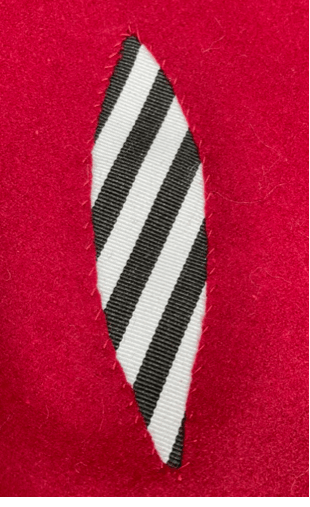
I cut out two circles of the red wool, 1/2″ larger than the canvas base at both the inside edge and the outside edge. I added slashes on the underside of the brim and carefully pinned and whip-stitched the decorative ribbon behind the wool.
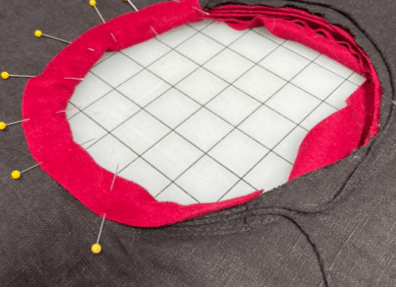
I cut diagonal bias tape of the red wool about 2 1/2″ wide, and machine-stitched the crown to the top side of the hat, and the tape to the inside of the hat.
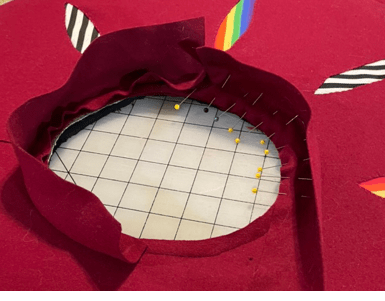
I added black cord to the inside of the crown, and stitched the edge of the bias tape down over the cord to secure it in place.
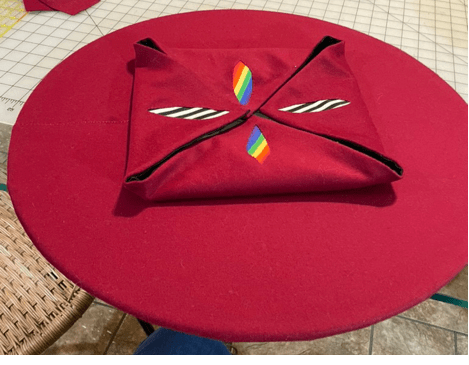
I folded the crown into the typical box shape, and whip stitched the edges together.
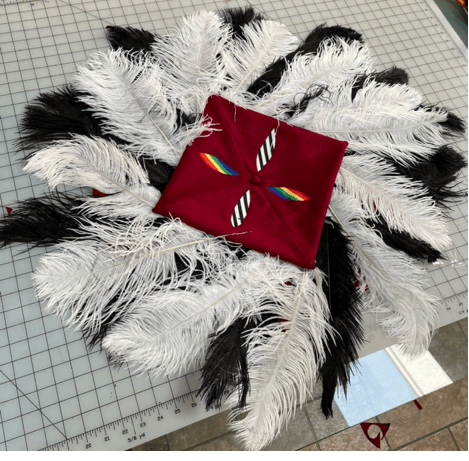
I arranged the feathers as I wanted them to look, then prepared each feather by drilling 2 small holes through the rachis.
I securely stitched each feather to the hat brim using a figure 8, and then overcast stitching.
The final hat. So many feathers!
The finished hat worn by the recipient.

Next Steps – More Hats?
I need to make at least one more tellerbarret, possibly two. My spouse has a lovely black and green waffenrock and needs a tellerbarret to wear with it – and I also need a sample completed tellerbarrett for my upcoming featherwork class.
I also have a mighty desire to make the below tellerbarrett for myself, because it’s a bit challenging and would be fun to wear. The portrait was painted in 1585, posthumously, of Christine of Saxony, who passed away in 1549.
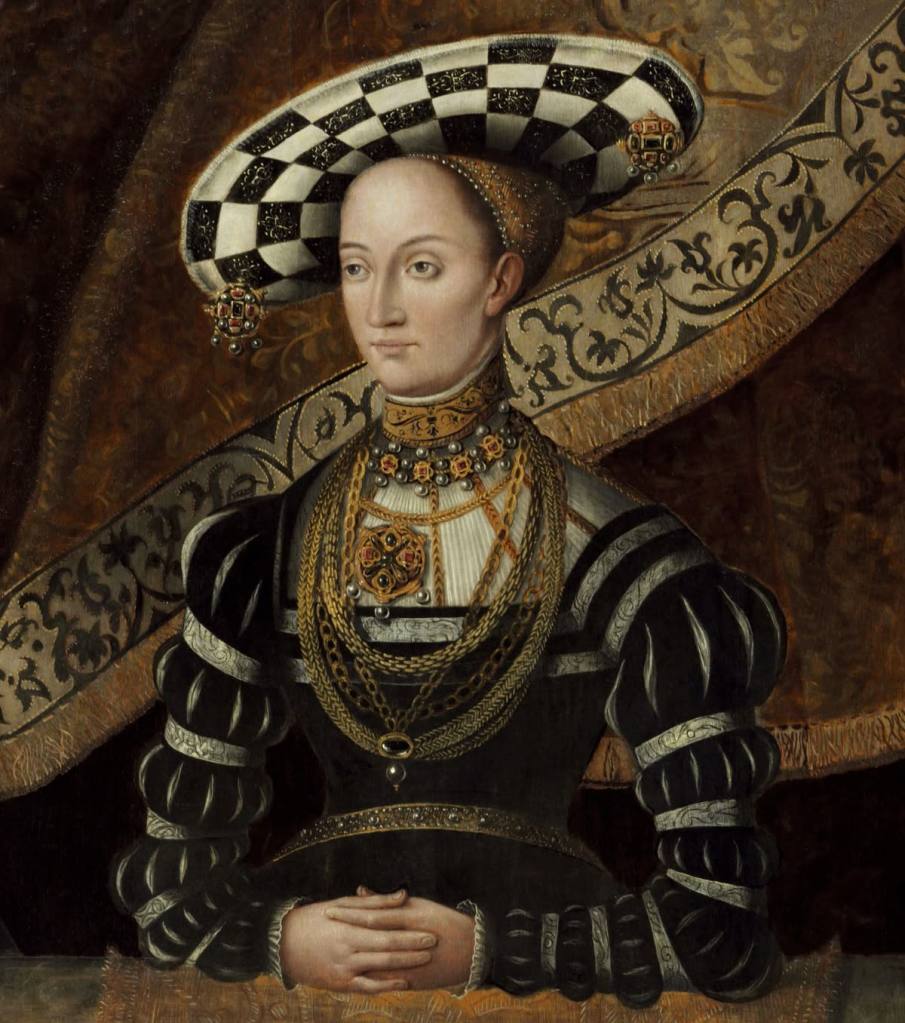
Posthumous portrait of Christine of Saxony, ~1585, Jost vom Hoff

