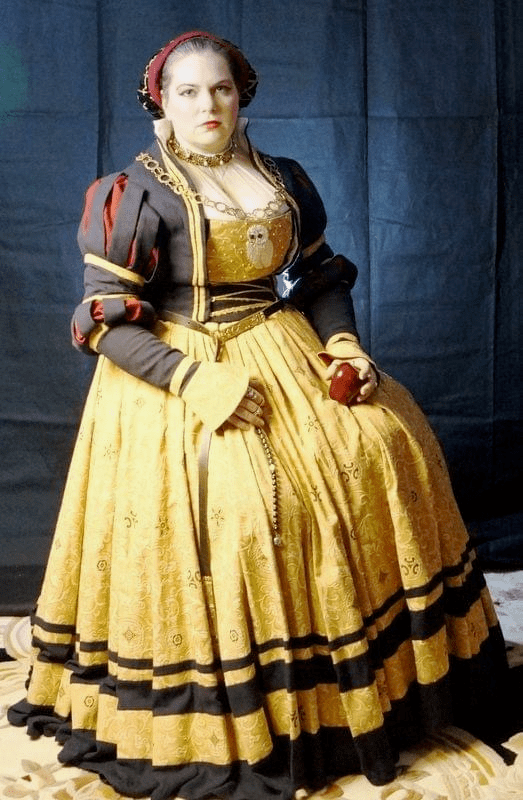
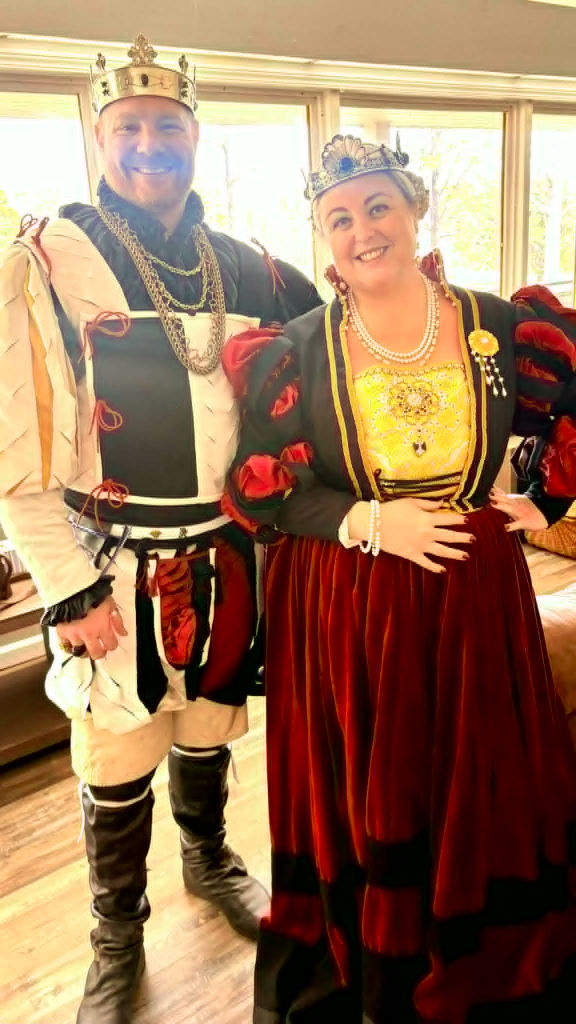
To clarify, the gown is named Gertrude; the Queen is Alianora.
In the realm of German renaissance gowns, the Saxon gown (also known as the Cranach gown) is peak complexity, glamor, and conspicuous consumption.
Athos and Alianora stepped up to reign in An Tir in AS 58. Alianora focuses predominantly on her chosen period – 15th century European – where she is not only comfortable, but also is the champion of bling and embellishment.
Intercultural anthropology note: in An Tir, garbing the royals is a BIG DEAL. There are teams of tailors dressing and accessorizing the Crown for each reign, and many times the Royals have new, amazing garb for every crown and major event during their reign. Alianora and Athos’ garb team, local friends all, encouraged them to explore a bit – a houppelande, byzantine, Roman, and, well, I talked her into German renaissance.
Alianora and Athos’ garb coordinator, Mistress Anissa, has a background in professional costuming. She decreed that every new set of garb would have a dress rehearsal the weekend before it was worn. The rehearsal ensured no last minute all night sewing sessions, no weird fit and finish issues, and no missing accessories or outfit elements. I highly recommend this for any big, high-stakes garb project!
Design Choices
Alianora and I looked at many portraits and reconstructions and thought through how we could construct and proportion the garment to be graceful but also comfortable. I tend to think of Saxon gowns as a paper doll assemblage.
Pick a collar type you like.
Pick a bodice style you prefer.
Pick a sleeve style that works for you, and that you’re willing to undertake making.
Pick a skirt style and guards you like.
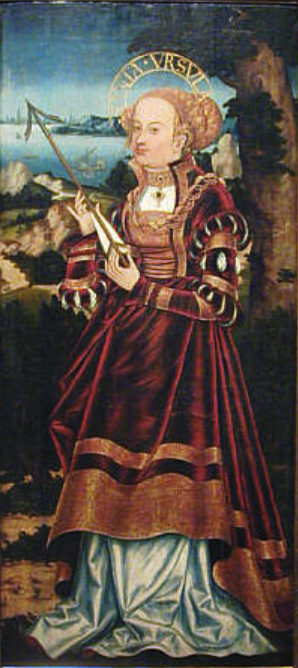
And then think about color and pattern, and how those will work in the context of with the garment shape. This particular gown was a primary resource for us.
St. Ursula, painting from St. Mary Magdalene altarpiece, created 1519-1525 by unknown artists
Who is St. Ursula, portrait above, and why is she wearing a Saxon gown?
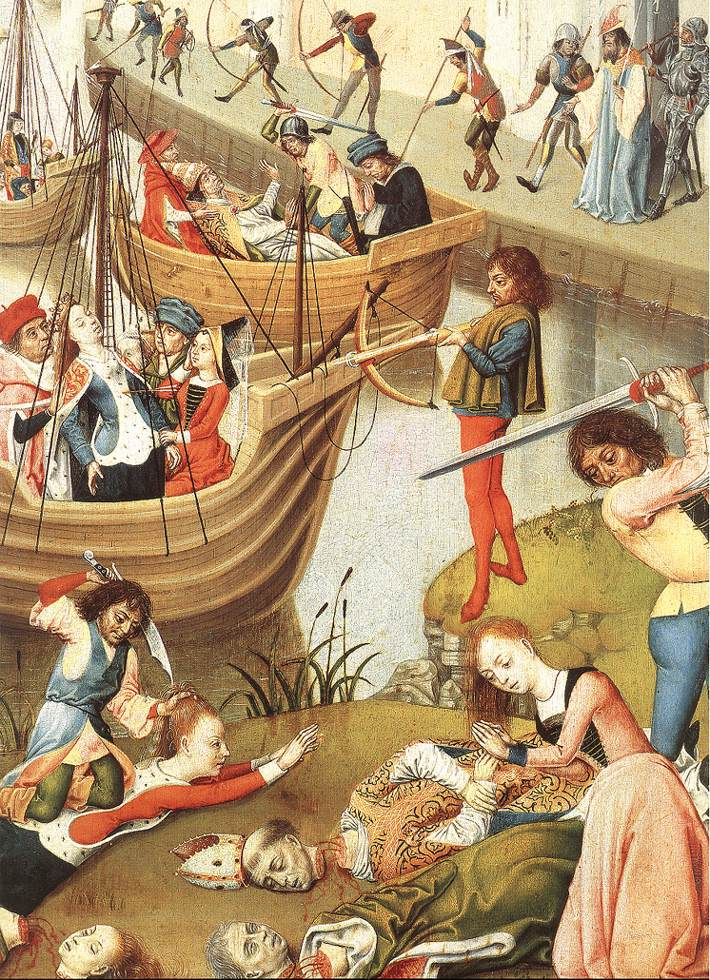
The story is not well documented, and is more legend than history. Ursula was a 4th or 5th ct Romano-British Christian woman who was promised in marriage to a pagan prince in Armorica. She may or have been a warrior princess and leader of shieldmaidens. She requested a pilgrimage to Rome for herself and her handmaidens prior to her marriage, but the women never arrived. They may have been blown off course, and never arrived in Armorica.
Ursula recruited and trained shieldmaidens as she journeyed, and the number of her followers was rumored to have have reached 11,000 women and girls. (This number is contested and often attributed to math or translation errors.) When her travels led her to Cologne, Ursula and her followers clashed with the invading Hun army. The invaders wanted to take them as wives and concubines, but Ursula and company were having none of it. They chose to die rather than submit to marriage to pagan tribesmen, and are considered martyrs.
Ursula was believed to have been slain with a spear or arrow, hence she bears an arrow in her portrait. As a martyr and a holy woman, she was beatified. She is the patron saint of Catholic education, teachers, and students, and of the Ursuline order of nuns dedicated to educating girls.
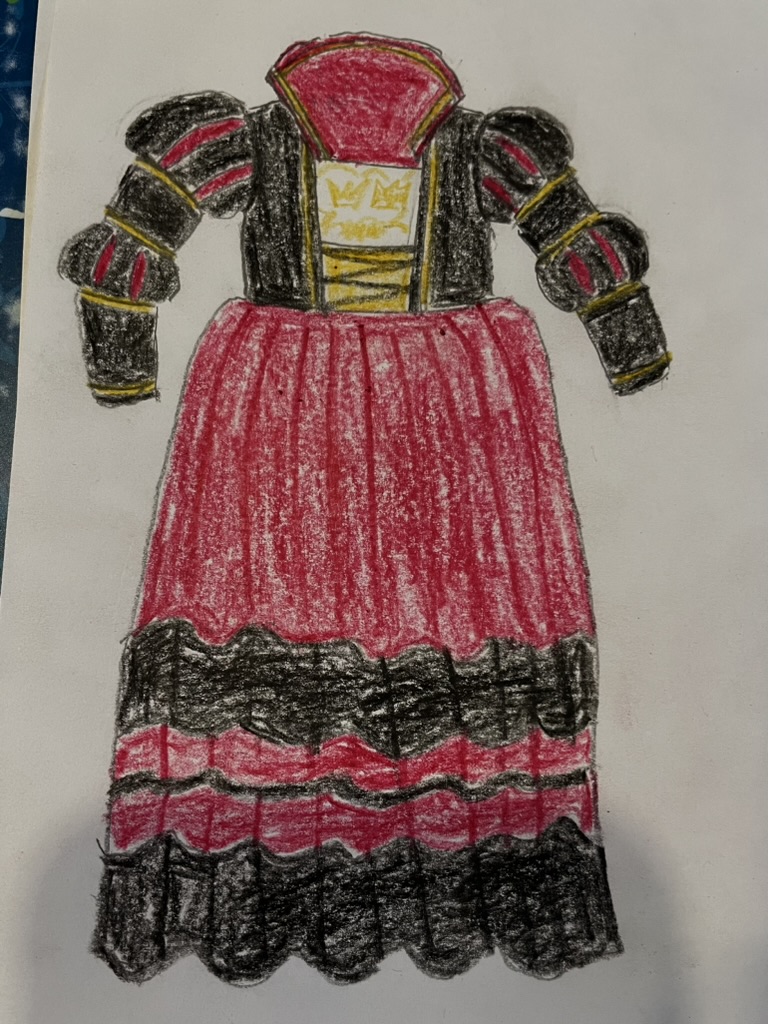
Elements
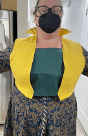
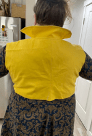
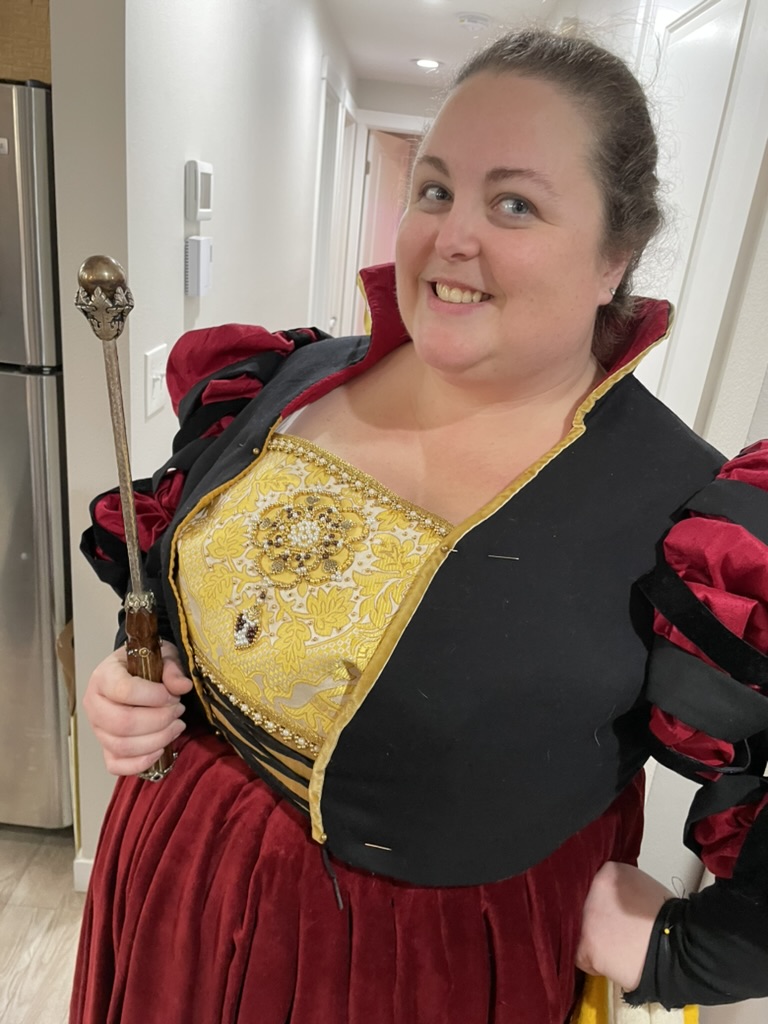
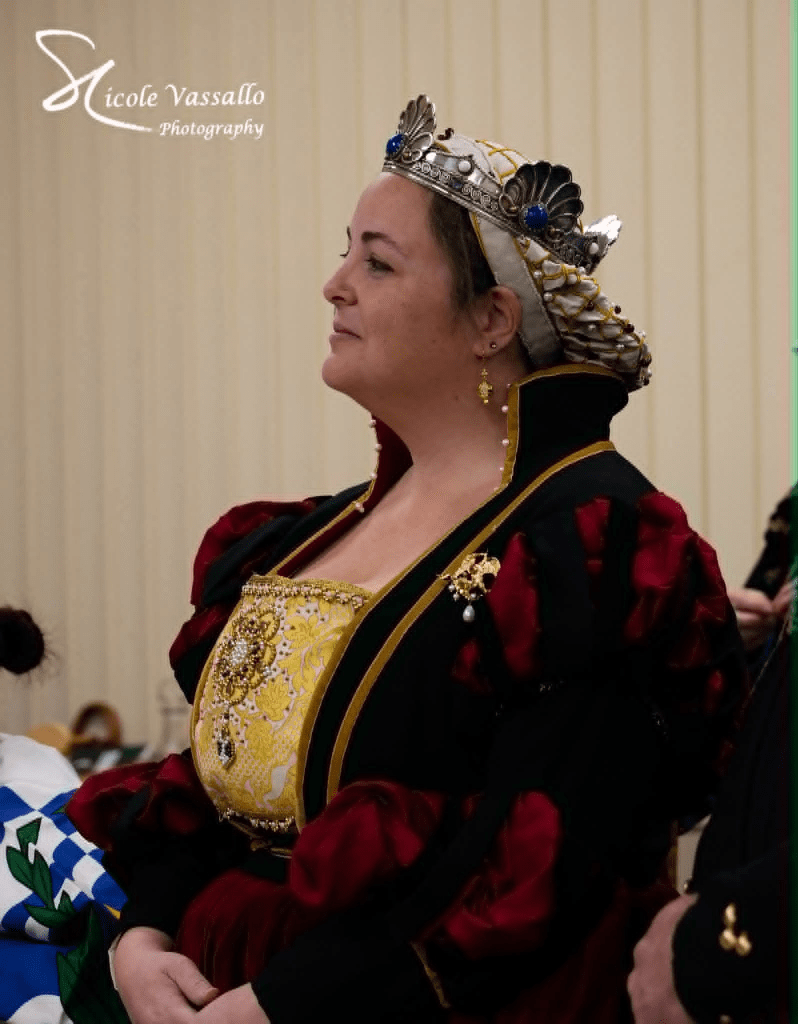
Collar style: stand-up wicked queen collar, because wicked queen collars are THE BEST
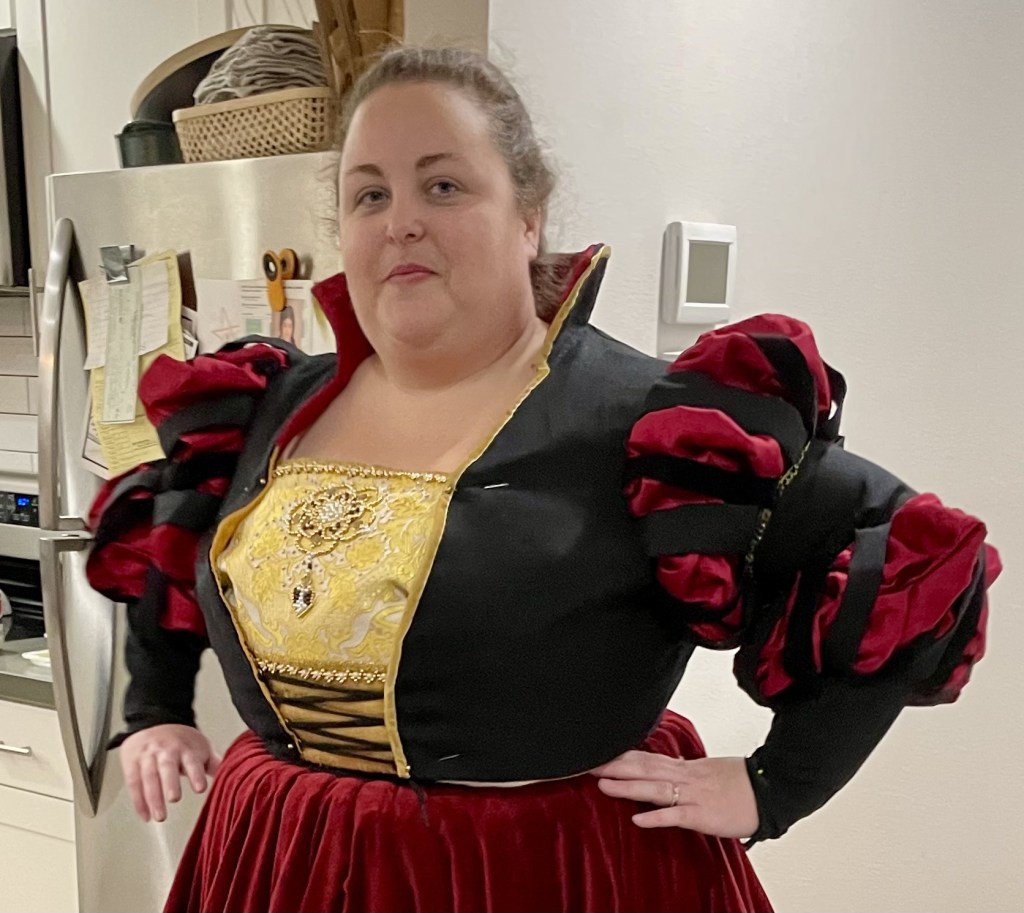
Bodice style: we wanted a solid stomacher, rather than brustfleck laced over hemd, and we wanted simple striping. The advantage of a stiffened stomacher is that it can sit in front of the waistband, giving a smooth transition to pleats that is seen in so many portraits.
Sleeve style: we wanted all puffs and slashes, and a little larger sleeve volume.
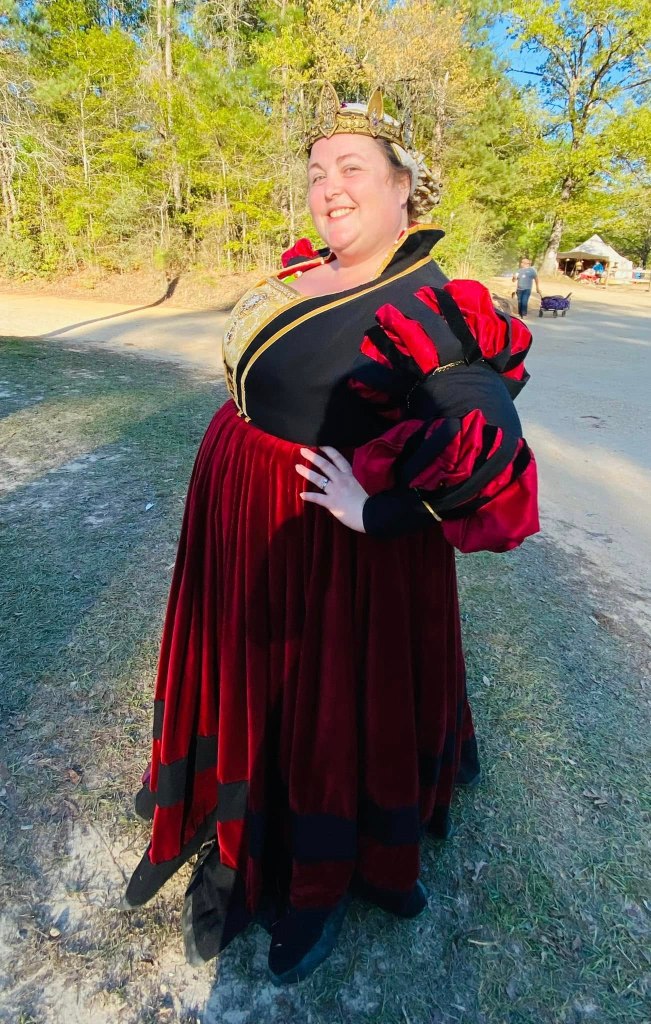
Skirt style: we wanted to keep the guards simple and we decided on organ/rolled pleats since we had the fabric yardage to make that pleat style. We also decided to make the skirt and bodice separately (which is NOT precisely period) and point them together, because this voluminous dress would need to be easily packable for travel.
Fabric: I had 10 yards of cranberry cotton velvet in my stash. We decided on black wool broadcloth for guards and bodice – which we chose because fine wool reads blacker than taffeta – and gold taffeta for trim stomacher/brustfleck. Note: I will never work with that quantity of velvet again. Not fun.
Here’s a sketch of the design:
The Team
While I had the bright idea of creating this dress, time was limited, and, I needed help – this is a 200-300 hour dress. I had a number of handy volunteers on this project. Honorable Lady Isentrud von Osten was down for the underkirtle and sleeves, and also helped with bodice finishing. Lady Audra of Madrone worked on the skirt guards. Countess Aryana Silknfyre put together the brustfleck/stomacher. Dame Nicolin Bray helped with hand sewing construction. My spouse and tailor’s assistant Honorable Lord Christopher MacEveny helped with wrestling large amounts of velvet and stitching down the rolled pleats, which required a sailor’s palm and lots of hand strength. Countess Rauokinn provided the goldhaube to top it all off. And Waldgräfin Taran Daestingr provided the pattern and instructions for the supportive under-kirtle.
The Process
Pattern Development
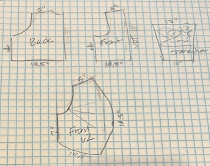
First, we took measurements and worked on a mock-up. I wanted the garment to fit just right, so we did three or four mockups before we were happy with the bodice fit and cut. Note that I did the mockups in canvas, not muslin. When the bodice will be multilayer and sturdy, it’s helpful to get some sense of that sturdiness and drape from the mockup fabric.
Note the pattern piece shape for the bodice front – it took me a few tries to identify a front curve that worked, and this one fitted well.
We divided up the fabric, distributed the pattern/dimensions, and started working on the components.
The Skirt
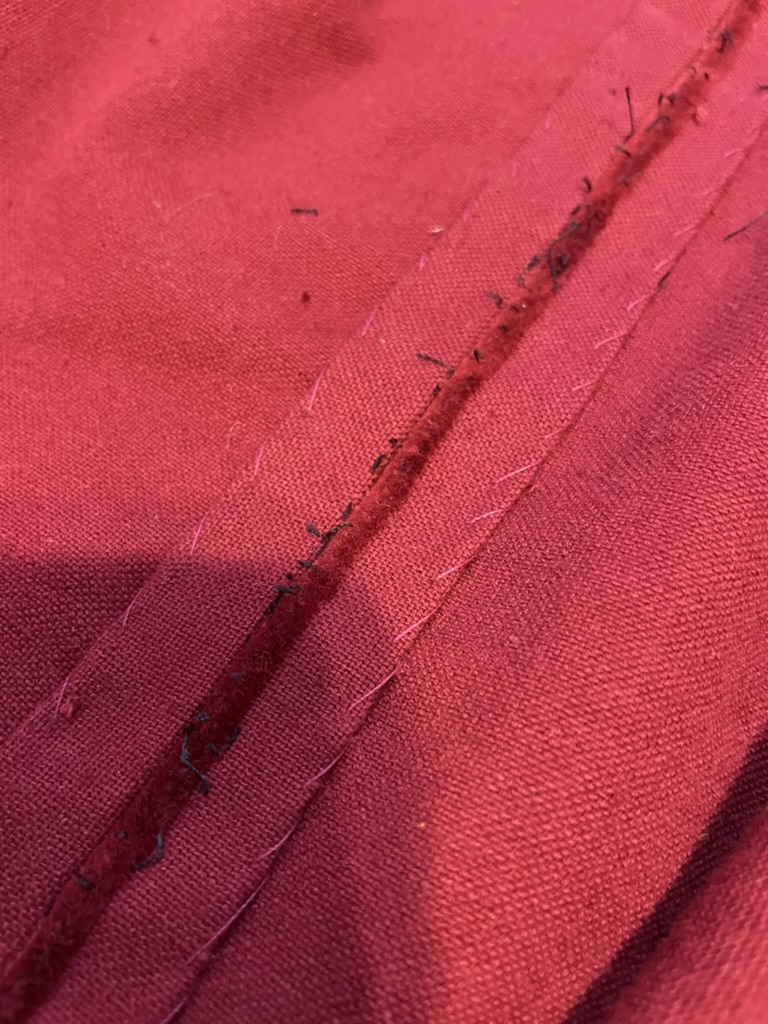
I debated whether to line the velvet skirt with linen, but we decided that because we were using six full-width panels, we didn’t want the added weight. Since we cut the velvet edge-to-edge, we simply whip stitched the selvedges down on the back side for a neat finish.
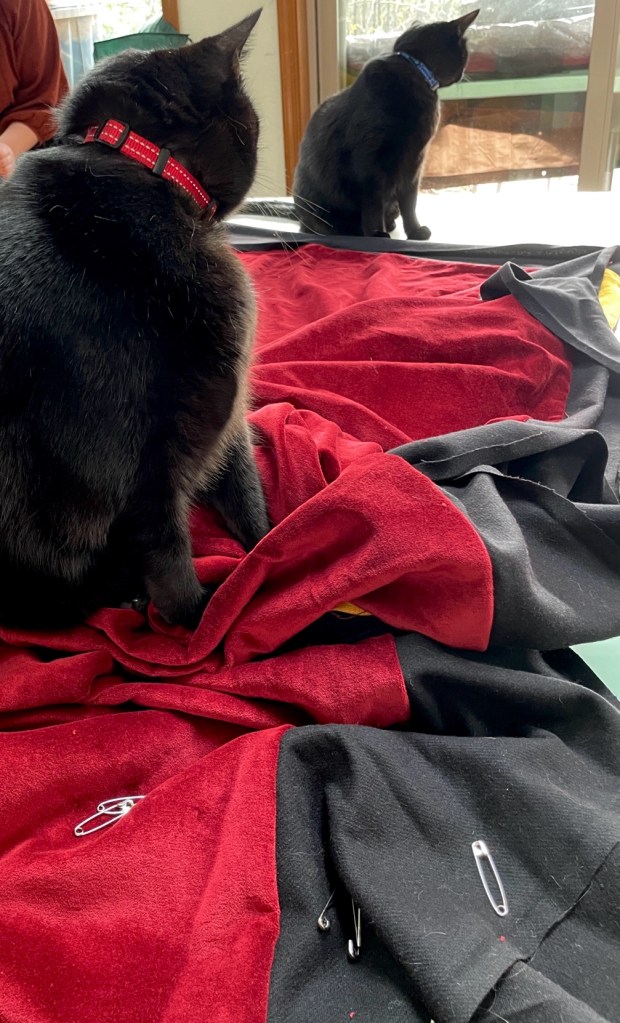
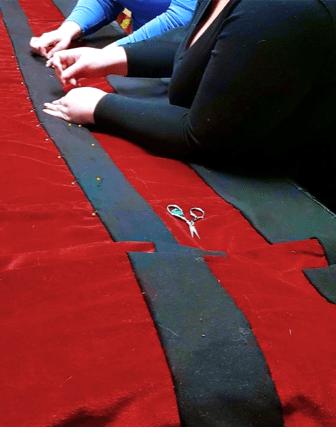
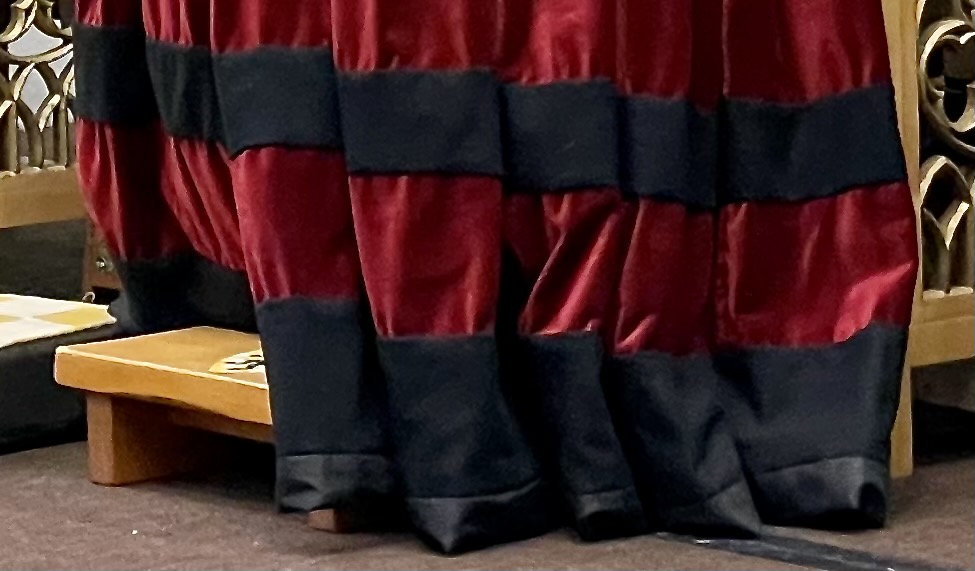
Audra and I worked on the tropical-weight black wool skirt guards at my house, using my favorite furry pattern weights.
Our first pass came out a bit puckery – it’s hard to neatly stitch any fabric on top of velvet – and Audra was a fantastic sport about redoing it.
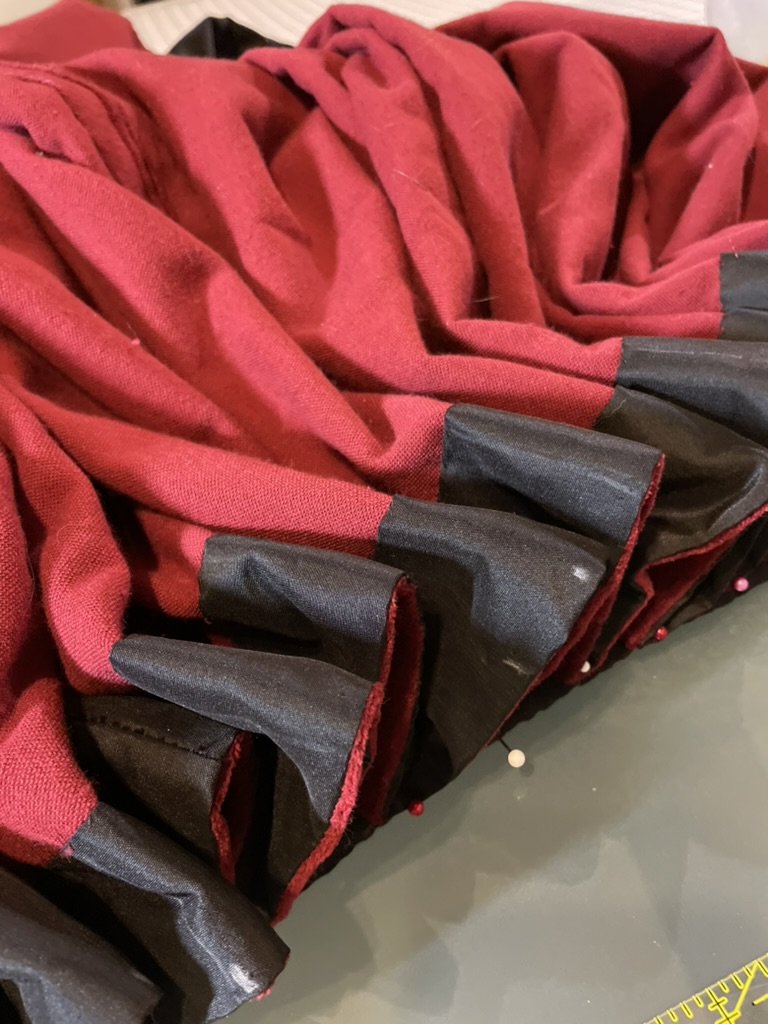
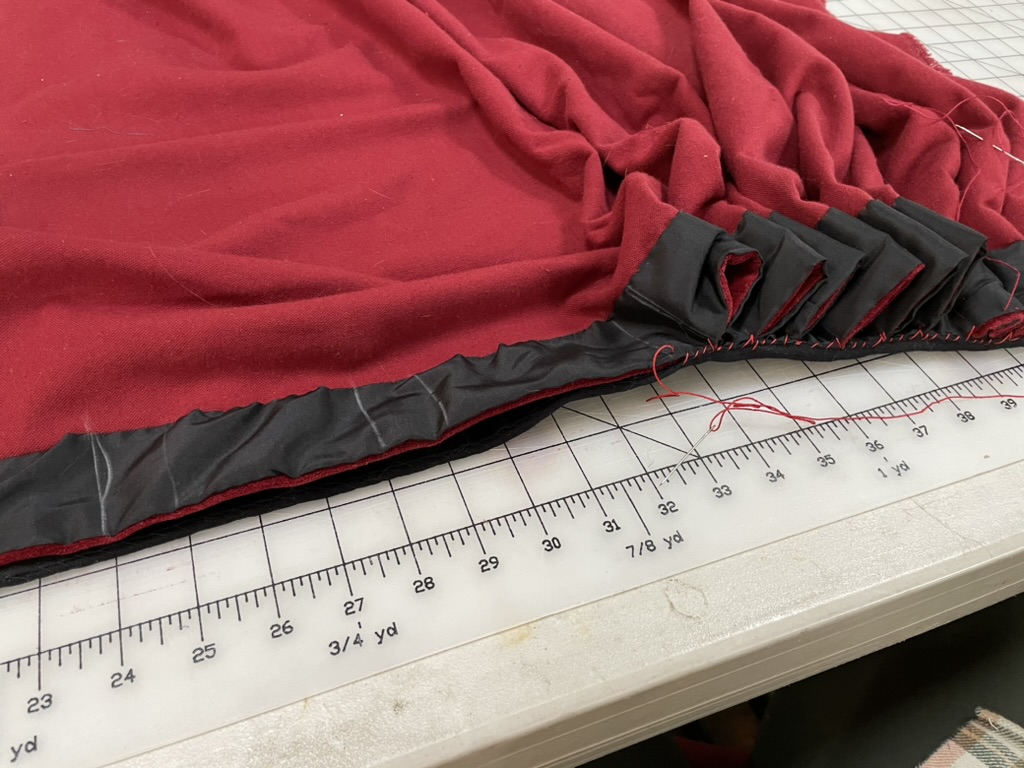
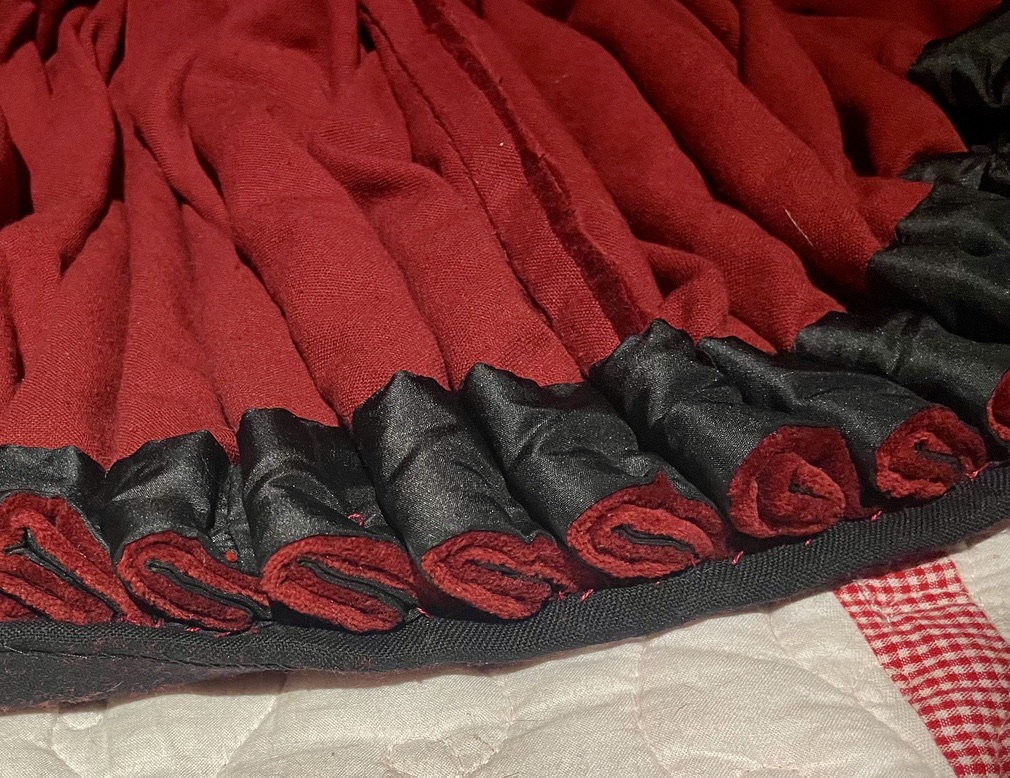
We decided on rolled pleats to get the characteristic columnar fall of the skirt.
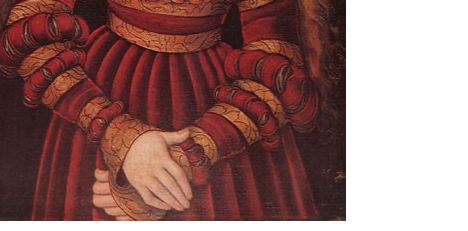
Detail from Sibylle of Cleves, painted by Lucas Cranach the Elder, 1526
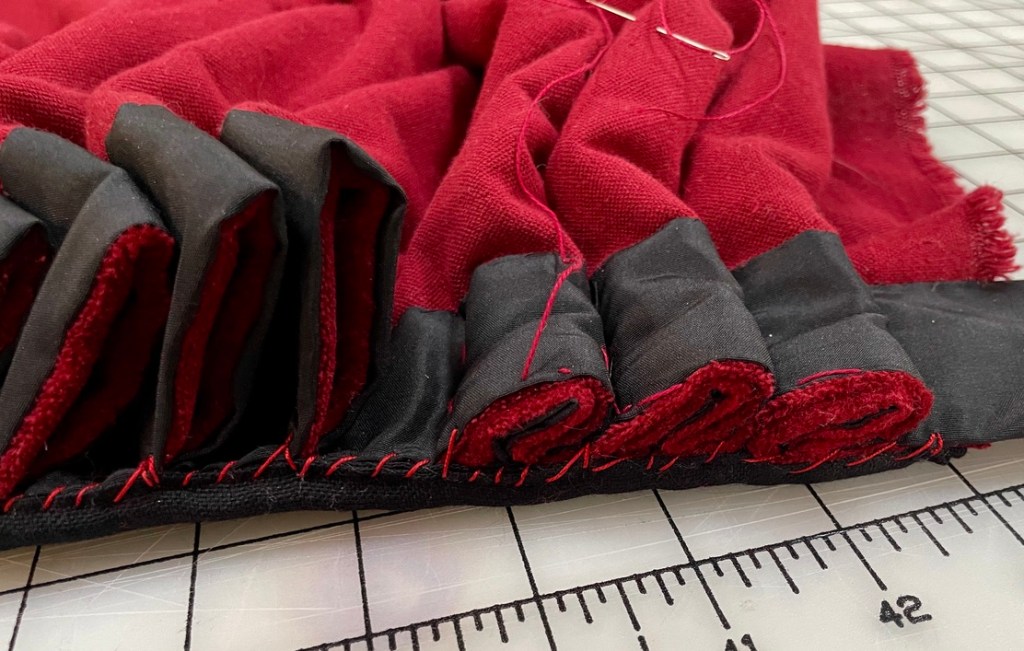
Rolled pleats are challenging! We finished the top edge of the skirt with taffeta (which may have been a mistake) to add volume and shape to the pleats. We then lined up the skirt with the waistband, matching markings at ¼, ½, and ¾ point. We carefully laid out and aligned the pleats. We then hand-sewed a single pass with sturdy 30wt silk thread, fixing the fabric in place.
We rolled and pinned the pleats and hand-sewed a second pass firmly attaching the rolled pleats. The dense taffeta took incredible hand strength to pierce multiple times in a pass, so my husband served as my tailor’s assistant, and finished the pleats under my direction using a sailor’s palm, a sturdy, but very sharp needle, and more of the 30wt silk thread. Next time I’d use medium or heavy weight linen.
We also bound the bottom edge of the skirt with the same taffeta, to give it a bullet-proof finish that wouldn’t get torn up with wear over different surfaces.
The Bodice
The bodice team included me developing the pattern, creating the shell, and pad-stitching part of the structure, Dame Nicolin assisting with some of the pad stitching, and Honorable Lady Isentrud installing the lining, finishing and embellishing.
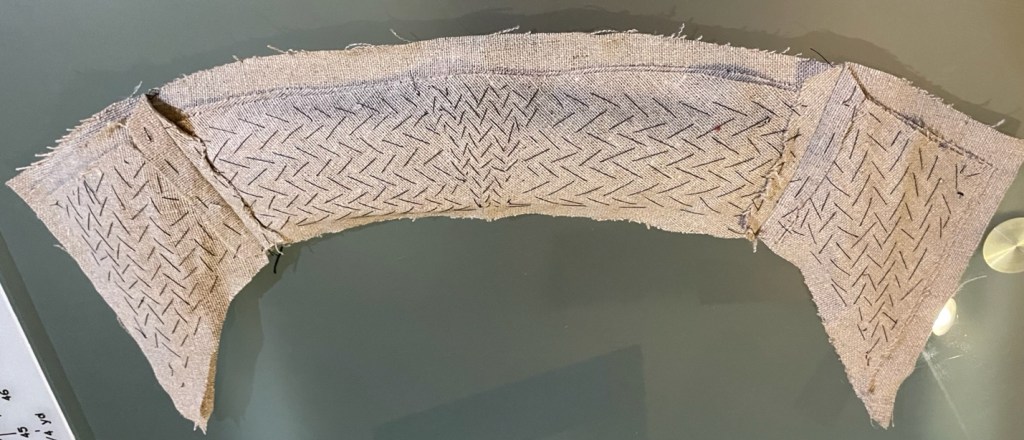
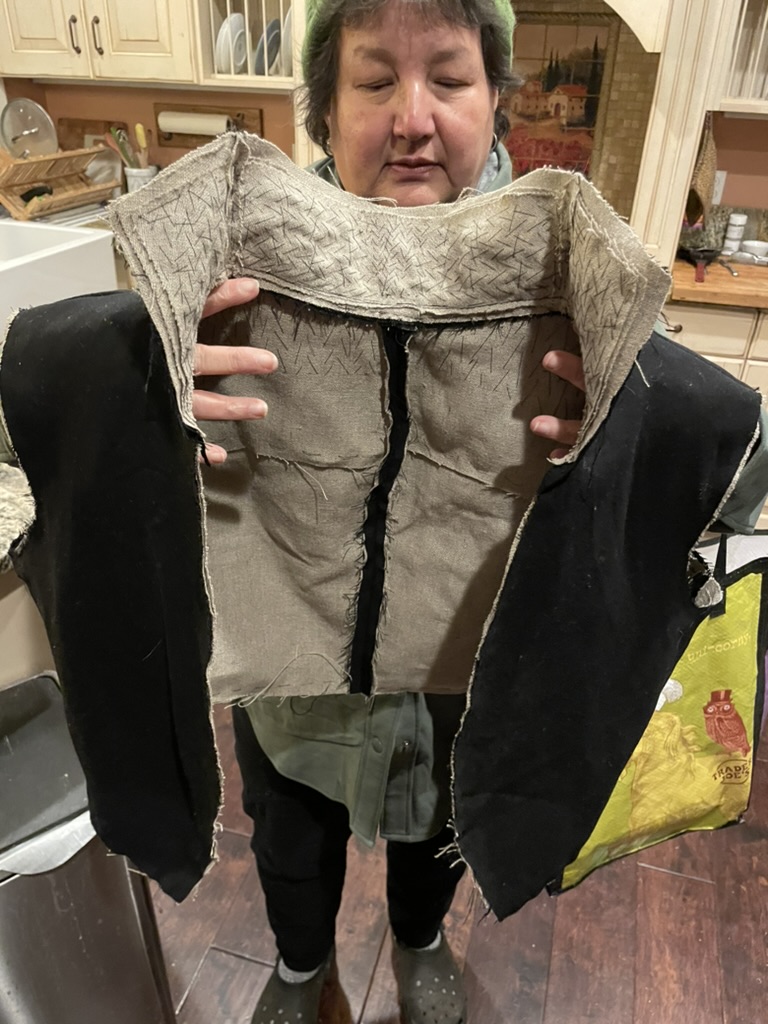
I started with creating a linen canvas interlining. I pad stitched three layers to the collar, adding shape and curve. I then pad-stitched a strip of canvas to to the front edge, and a second layer of canvas to the the shoulders.I then basted and prick-stitched the interlining to the tropical-weight black wool shell.
Isentrud trimmed the canvas around the edges, then folded over and stitched the black wool to the canvas with tiny whip stitches. She securely machine-sewed the sleeves to the shell with a double-pass, and carefully notched the curved edges of sleeve and armscye to lay flat. She installed a gold linen lining to the bodice using a prick-stitch around all edges, and also along seams to secure it in place, and finally added a red silk taffeta lining to the collar and front neck edges with prick stitch and whip stitch, matching the red silk in the sleeves.
She tried on, measured, and marked lacing rings, and securely stitched them in place through all fabric layers (all layers are important – stitching through only partial layers for a smooth outer finish will make the front bodice edges pull strangely). She proceeded to embellish the bodice: gold velvet ribbon along front and collar edge, and a second gold velvet stripe 1″ inside the first. She added bonus pearls to the front edge of the collar for a subtle additional bit of bling.
Finally, she marked and added pointing cord to the bottom edge of the bodice, to align with eyelets on the skirt waistband.
Sleeves
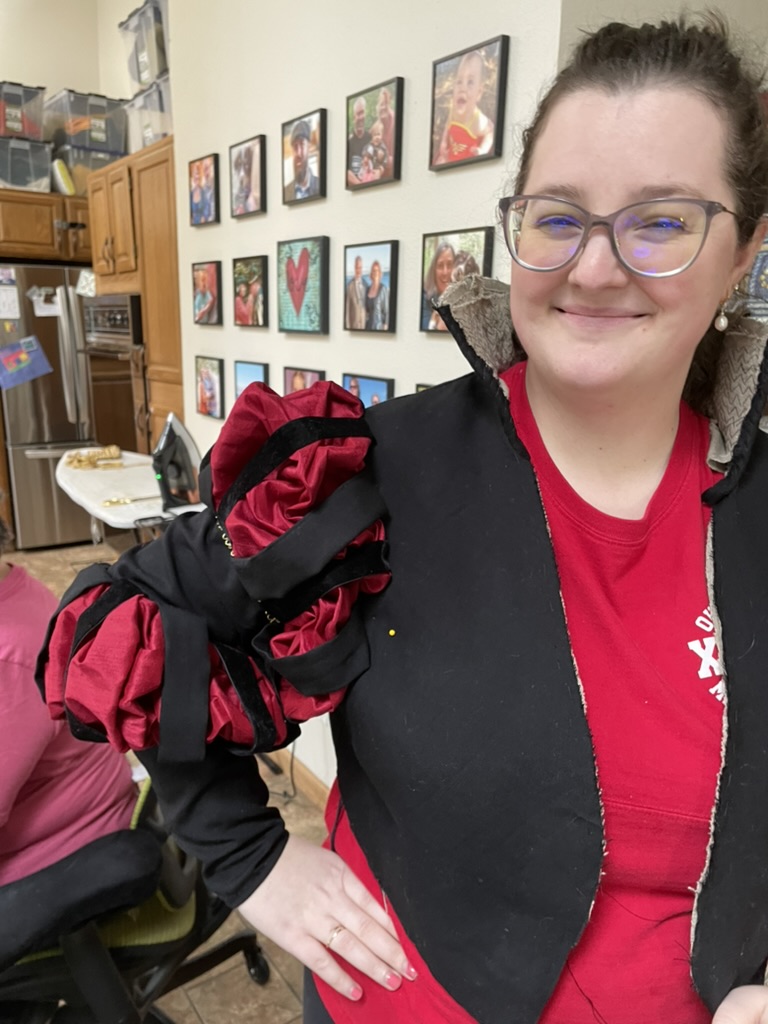
The sleeves were all Honorable Lady Isentrud’s work. She is excellent at creating a layered, puffed and slashed sleeve, built up from the sleeve lining to the glorious poofy finish. I’ve documented this process in a different (forthcoming) post on a linen Saxon gown for a summer elevation.
She started with a sleeve base in lightweight white linen. She marked the sections of puff and black sleeve fabric. She cut generous strips of red silk taffeta to match the sleeve pattern, gathered the edges, and basted in place on the sleeve base. She then made 1 1/2″ strips from the black wool, by sewing a tube from 4″ wide fabric, turning it, and pressing it flat She basted the strips in place over the red silk poufs. Finally, she cut black wool sections from the sleeve pattern to finish it, pressed the edges back, and whip stitched in in place to the sleeve base, neatly covering the edges of the silk poufs and black wool strips. She checked the sleeve length at the dress rehearsal, then hemmed the sleeves with a whip stitch and added bits of gold velvet and gold scallop trip to the edge of the black sleeve sections.
The Brustfleck and Stomacher
At the dress rehearsal, the brustfleck/stomacher, made and embellished by Countess Aryana, made its debut, and it was glorious. Pearls, garnet beads, gold beads — they all combined to enhance the backing brocade.
She first pearled and embroidered the brocade brustfleck, to emphasize the pattern. She joined that to the gold taffeta stomacher piece. She created a base of a double layer of canvas, and basted the brustfleck/stomacher piece over it, and trimmed the canvas edges. She then stitched a gold linen lining in place on the back side
We carefully marked the bodice and stomacher/brustfleck while Alianora was wearing it – very important because it will not wear smoothly if it’s marked lying flat – then added hooks to the bodice and eyes to the stomacher-brustfleck.
Finished Outfit
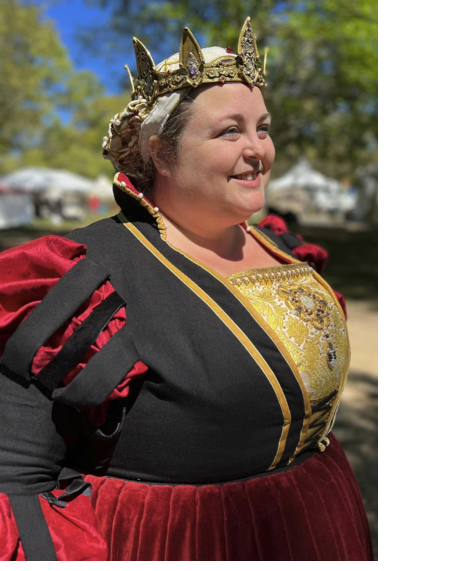
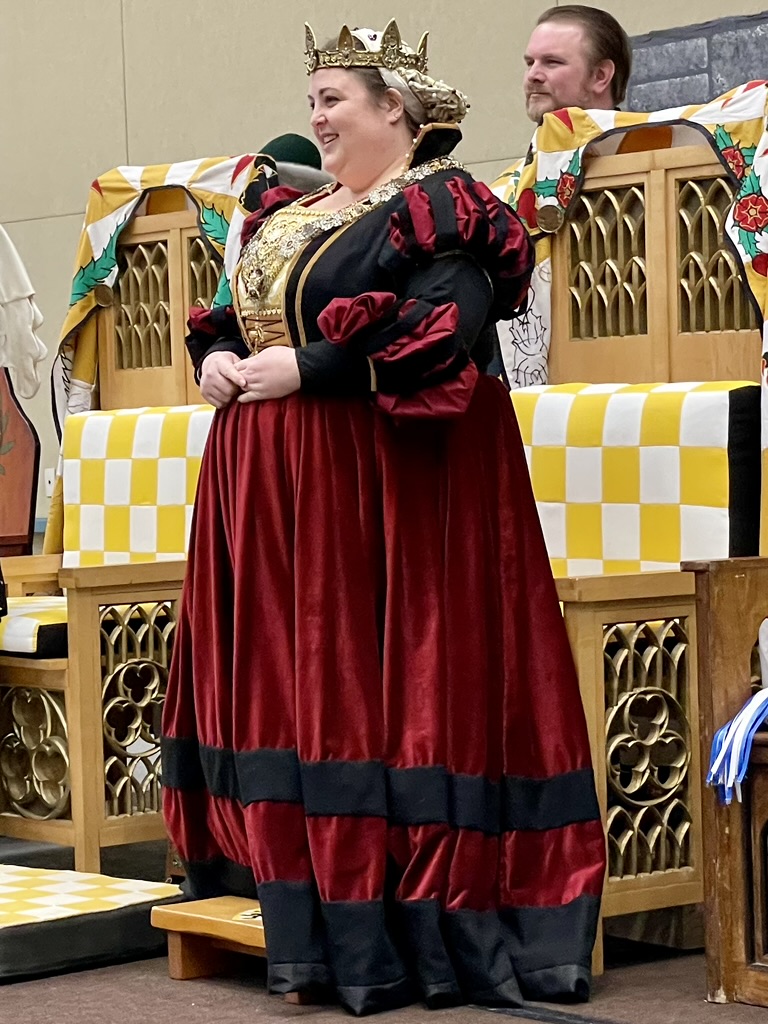
The finished outfit debuted at AS 58 Kingdom A&S/Queens Rapier Championship, and Queen Alianora wore it with grace and majesty. We were all very proud of how it looked and fit.
Any garment that is sufficiently large and imposing should have a name: her owner has christened her Gertrude. Gertrude has attended many events, and traveled to Gulf Wars and to Atlantia, where she and Athos reigned a second time, and Gertrude has been reworked and given a new lease on life.
Lessons Learned
Working with large quantities of velvet is not my favorite thing. It’s an uncooperative fabric – it creeps, puckers, and sheds – I found velvet fuzz in my sewing area for a couple of years after making this dress.
This is a sturdy dress with a very heavy skirt. In fact, the skirt could not be pinned to a hanger, it was so heavy – we had to use zip ties and a heavy duty wood hanger. The idea of joining separate skirt and bodice together for with points was creative but technically difficult, and required a personal dresser. I would use hooks and eyes next time.
I am a giant fan of the pad-stitched wicked queen collar – and we could have gone bigger and taller yet and kept the look cohesive.
While I was frustrated with the difficulty level and hand strength required for rolled pleats, they gave the skirt a perfect look and drape and were essential to the shape and proportions we wanted to achieve.
Would I make another Saxon gown? Yes, and in fact I have, at this time, and will document that one separately in the near future.
Reference Resources
Gnagy, Matthew. The Modern Maker, vol 1, published 2014, CreateSpace.com.