The Hemd
The underdress, or smock, was called a “hemd”. It was usually made from bleached or natural linen. Germans of this period often wore a hemd tightly pleated into neckline and gathered wrist to give the garment shape. Many hemde also boasted embroidery and smocking to stabilize and ornament the pleating
Hemde could be constructed multiple ways: gathered into a high funnel neck; into a loose, round neckline; or into a square shape. I prefer the high, funnel neckline, tied loosely with a ribbon or string – I feel it’s more practical for camp and warfield as it protects against sunburn, insects, grime, and is generally less drafty. I’ve also made a round neckline hemd to wear with slightly earlier period court clothing.
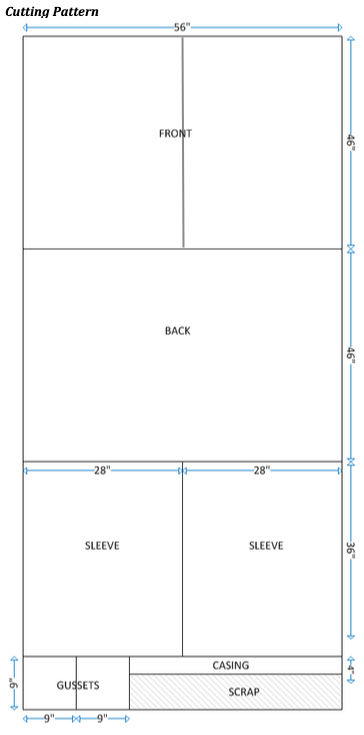
Fabric Layout for Hemd
The layout and pieces are the same for either the high-necked hemd or the square-necked hemd. Cut out the pieces for your hemd. Handkerchief weight linen is best, but medium weight linen or lightweight cotton will also work. If you want to use the devil’s artifact, the smocking pleater, you will need to cut your center front down the middle. Do not worry about trimming width to exactly 56″ – simply use the entire width of the fabric. I like my hemd to hit at mid calf, so I chose a length of 46″, but you may prefer a different length and should adjust accordingly.
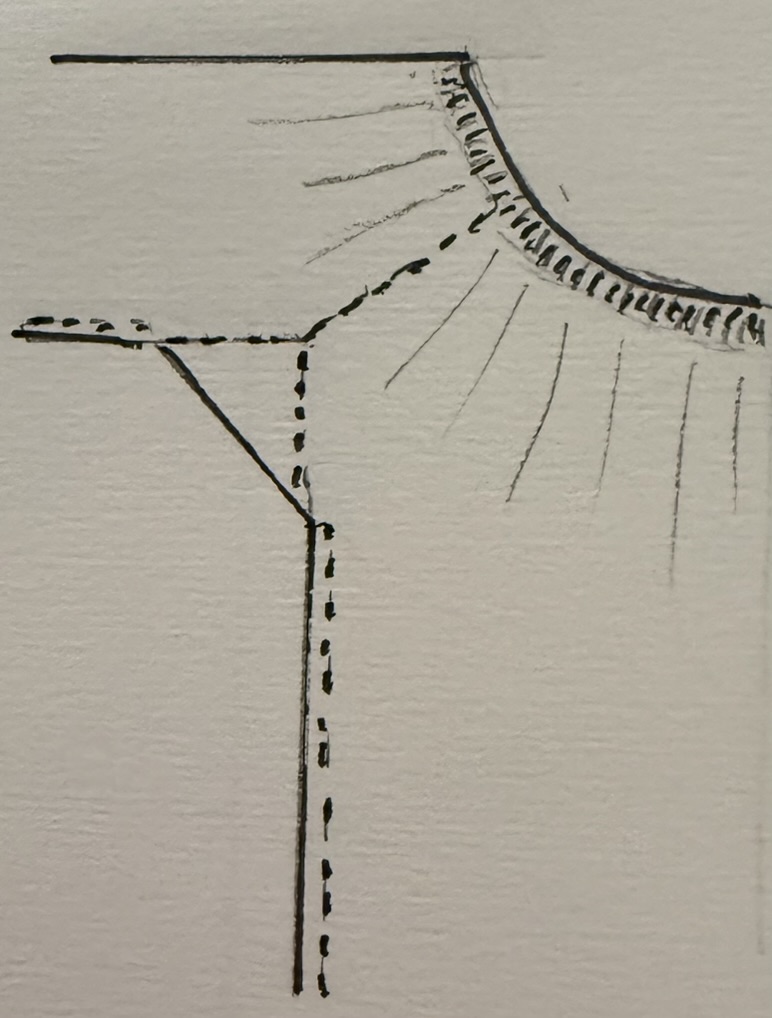
2 – Assemble, stitch and baste down all seams that you will pleat across. Generally, for a high necked hemd, you’ll sew 12″ from the top of the garment to the underarm gusset. Minimizing bulk for seam joins is very important when running it through the smocking pleater.
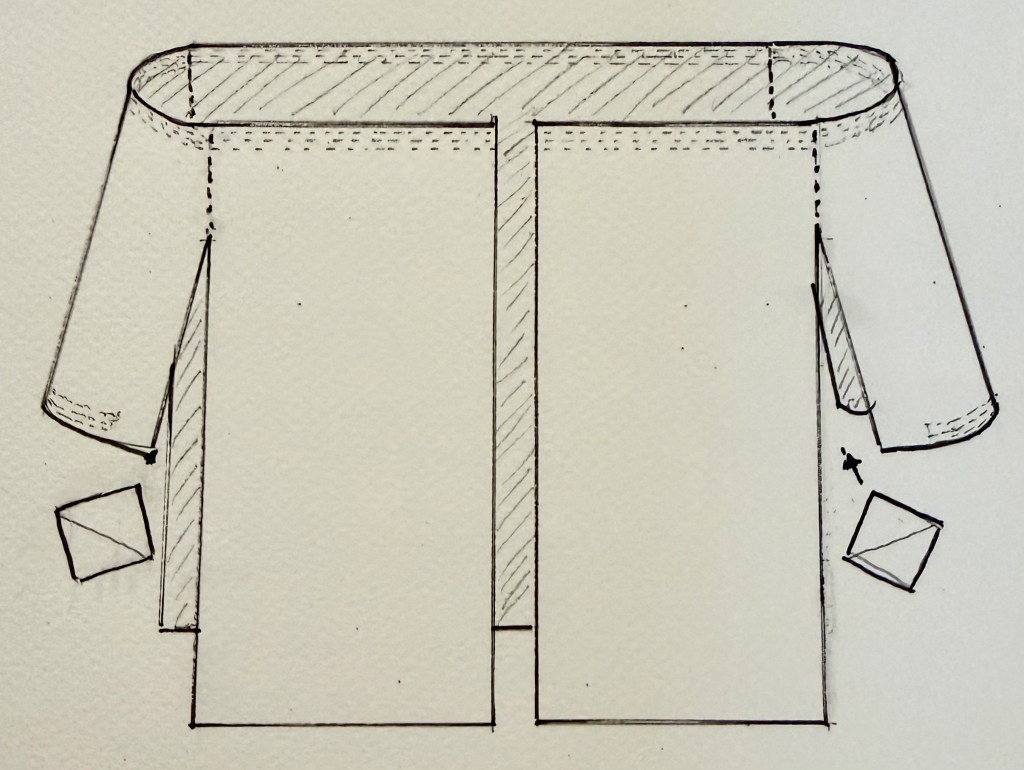
3 – Create a rolled hem perpendicular to all pleated edges *before* running them through the pleater. Pleat the hemd before any further assembly of the body.
Using the Smocking Pleater
I have done pleating by hand, with measured dots, which works well but is time consuming and uses up my hand sewing point before I ever get to the pretty embellishment part of the garment. See here for external documentation of that process
Instead, I’d like to introduce you to the devil’s artifact, black magic in action, that will create beautiful, even, tight pleats for you – anywhere from 10:1 to 20:1 ratio – depending on fabric weight and tightness of pleating. I am an irredeemable perfectionist, and used carefully, this little machine is very satisfying. The smocking pleater will NOT create variable depth pleats, but the pleating can be adjusted on the gathering strings to be very tightly pleated or very loosely gathered.
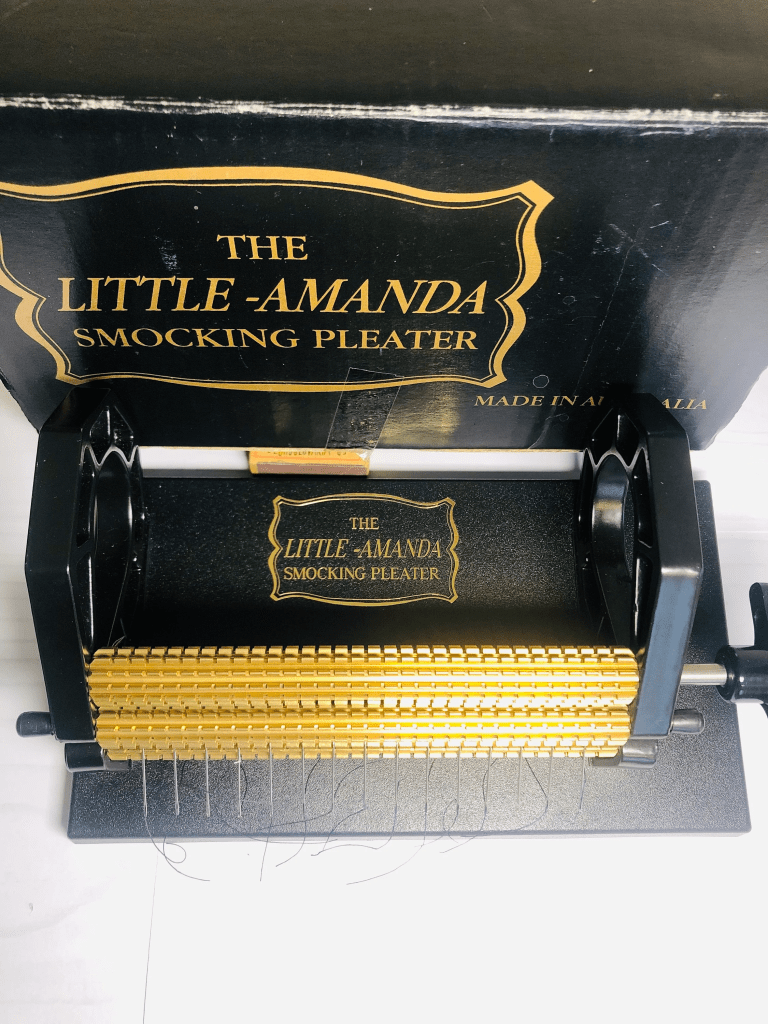
Decide how wide you need your pleated section to be, and how dense you want the gathering threads. I usually do 2 1/2-3″, using every other needle slot. Thread the needles with pieces of doubled heavy duty thread at least 150% the length of your desired gathered piece. I prefer 30 weight silk thread for sturdiness and ease of gathering, but linen thread or upholstery thread are also great choices. Knot the ends securely with a double overhand knot.
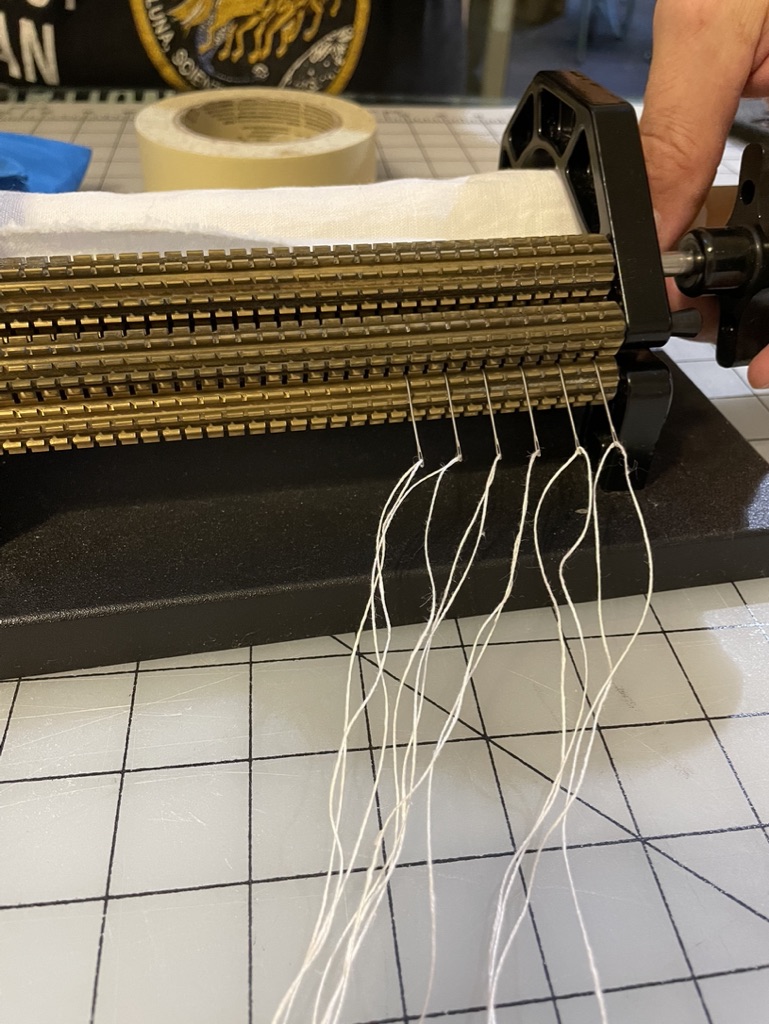
Preparing the fabric for pleating is 9/10ths of the work. For good results, your fabric must be carefully wrapped on a tube or dowel to maintain consistent tension and straight grain of fabric feeding into the pleater. Note that there is a maximum amount of fabric you can fit in the throat of the pleater – I’ve found 180″ of linen tightly wrapped around a dowel is the most I can fit inside the pleater. A tailor’s assistant is very helpful for this process.
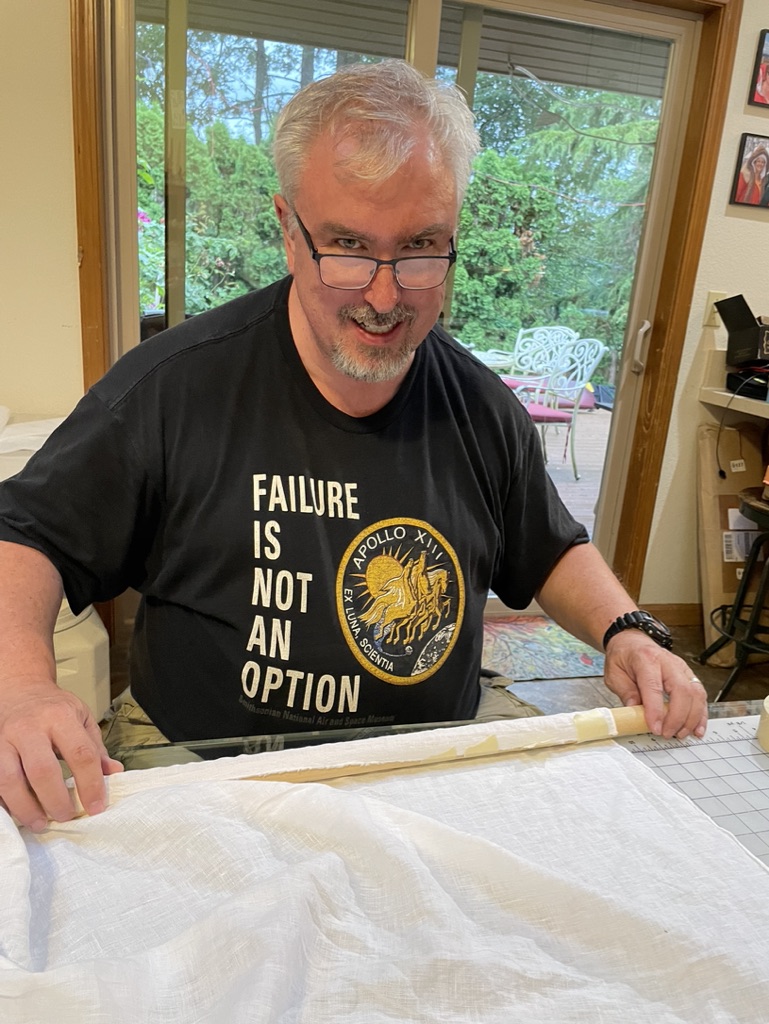
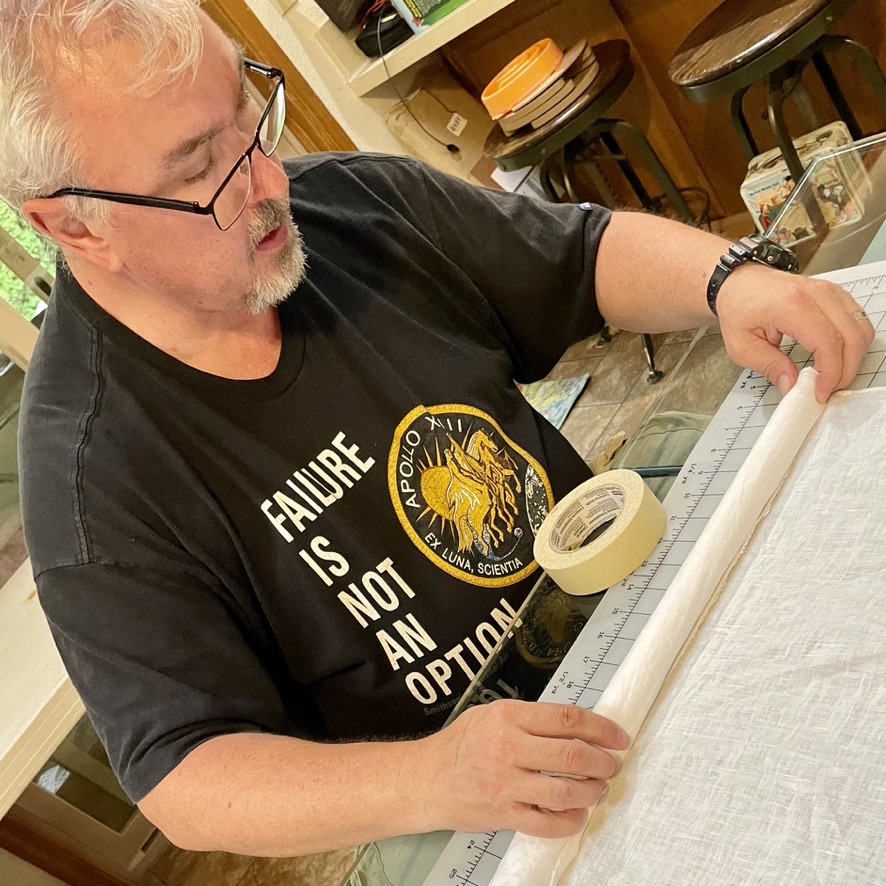
Feed the raw edge of the linen into the pleater carefully, to maintain the straight grain and perpendicular feed of the fabric. Your tailor’s assistant should assist you throughout the process, maintaining tension and a straight feed.
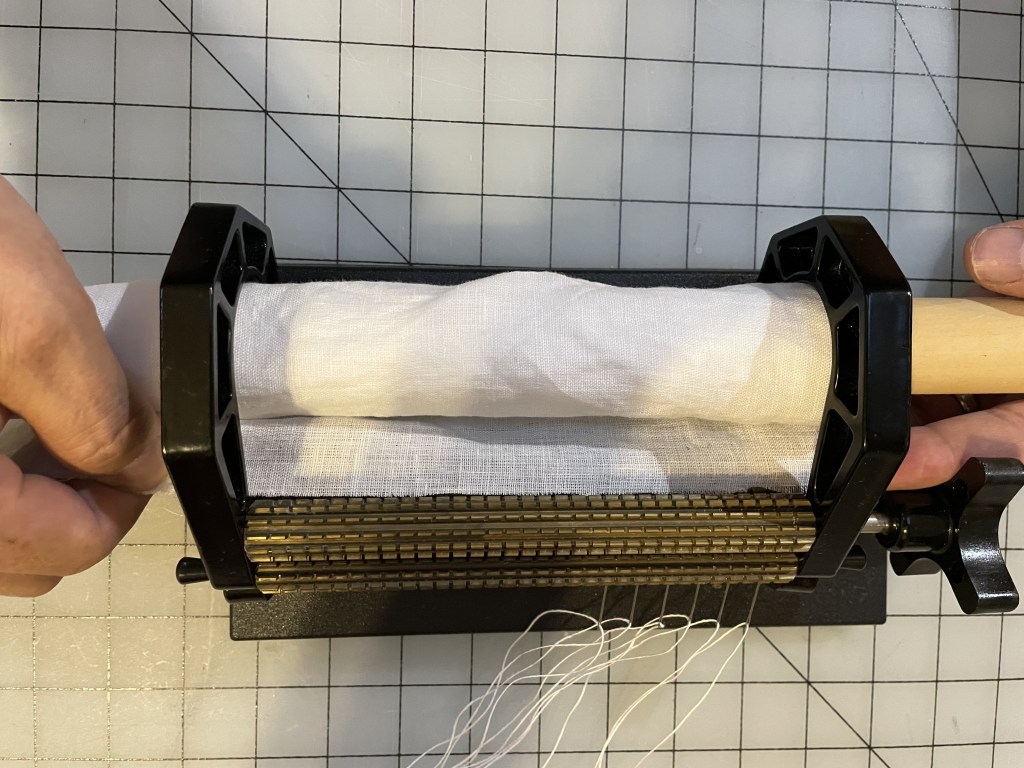
Carefully roll the fabric through the pleater and onto the needles and gathering threads. Your tailor’s assistant should help you maintain tension and a carefully aligned straight feed.
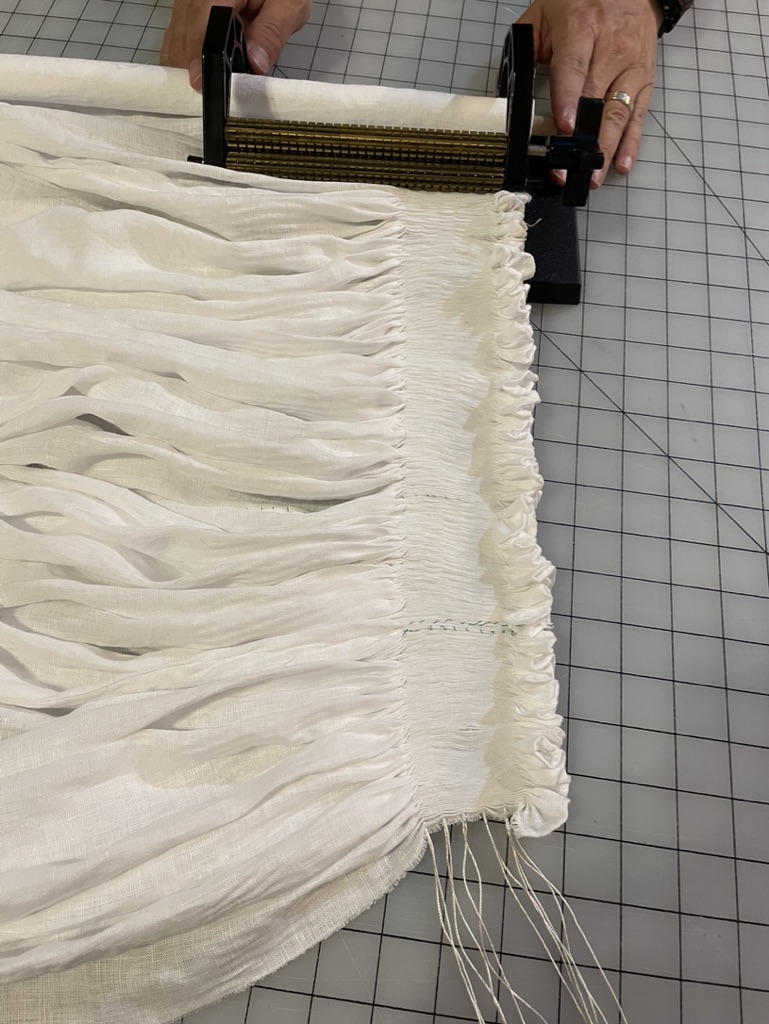
When you’re done with the pleating, cut it off the needles leaving as long a tail on the gathering threads as possible. Carefullly unpick 1-2 gathers to give yourself a seam allowance for a rolled hem, and then knot the gathering threads in place using a double square knot.
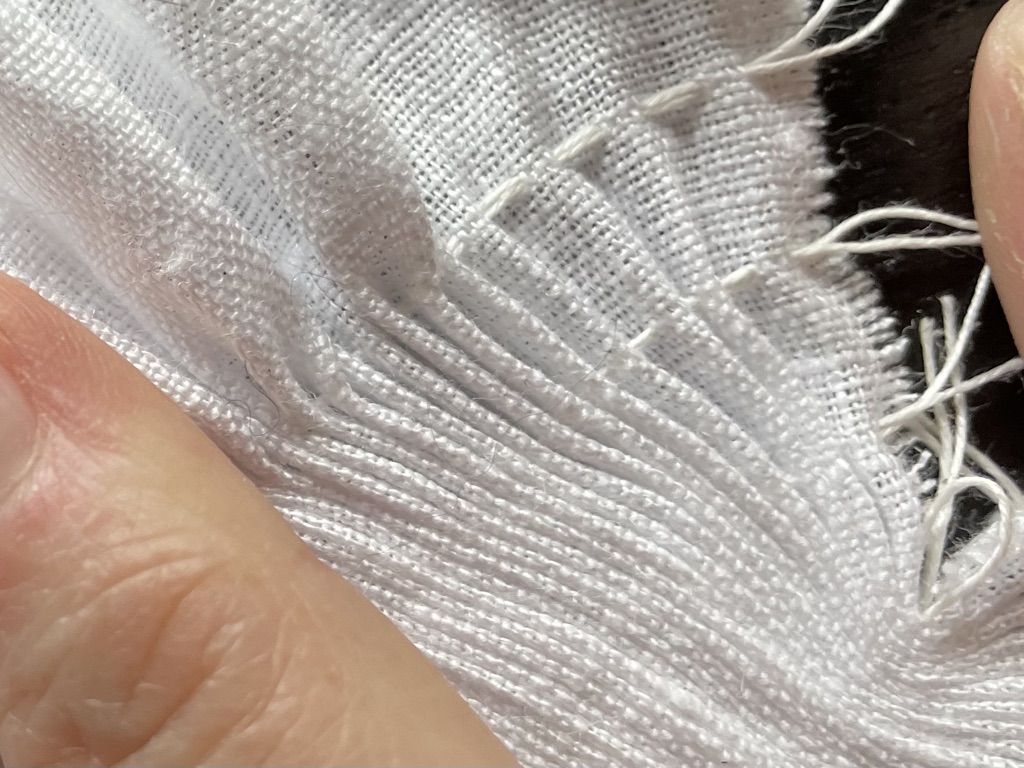
Back to the 10:1 to 20:1 ratio of linen yardage to finished pleated edge – this is 180″ of 3.5 oz handkerchief weight linen gathered into a 17″ collar.
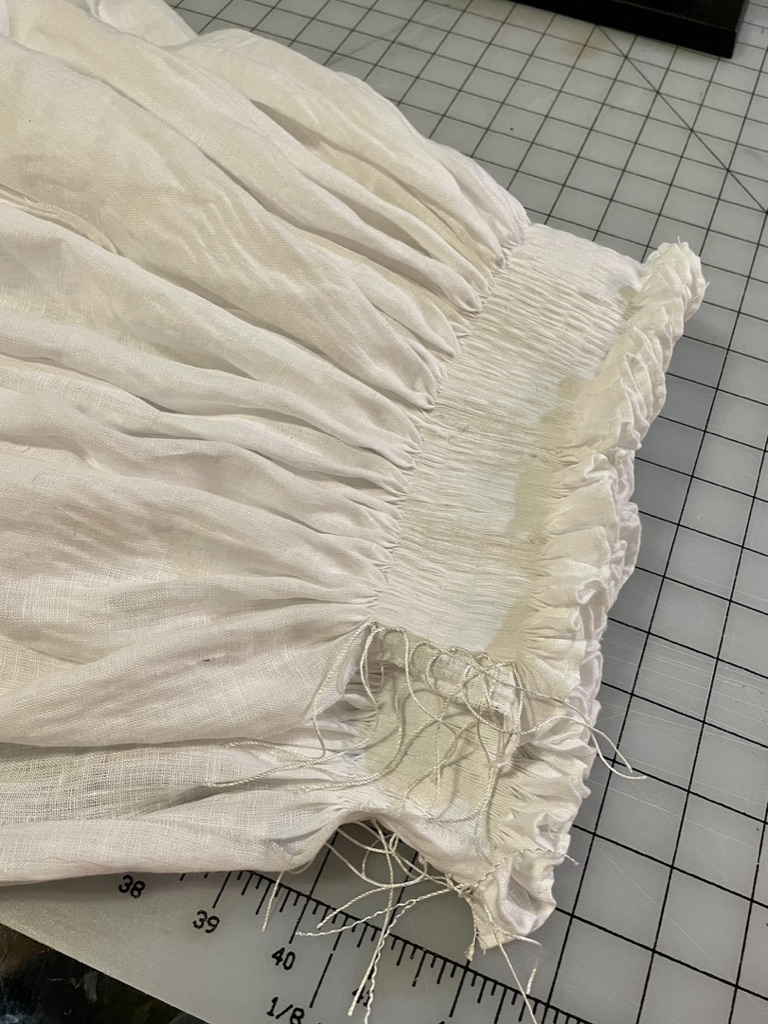
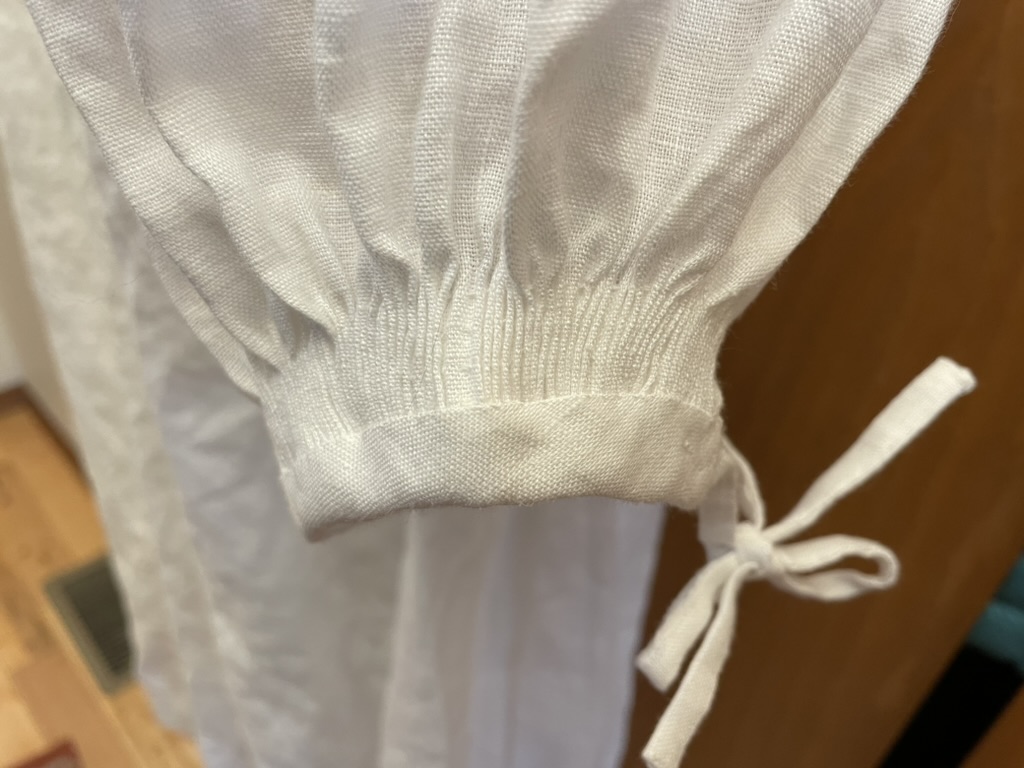
For the sleeve cuffs, because you are NOT at a 10:1 ratio of length to finished cuff, you have a choice – you can pleat the entire width of fabric loosely, and tie it off, or you can pick about half the desired cuff length back out, leaving tight pleating, and tie that off. Since someday, when I am feeling especially ambitious, I could add smocking stitches to stabilize and decorate the pleating, I chose the option of a shorter length of tight pleating.
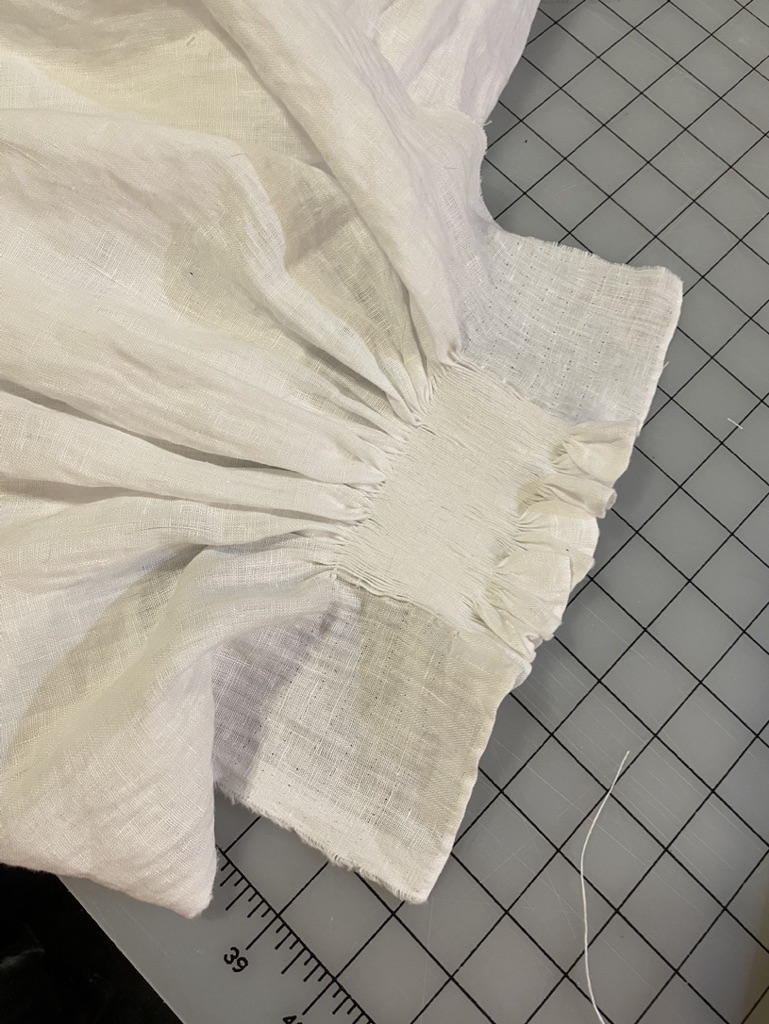
After I knot off the length of pleating, I cut lining panels of the same white linen, press back the edges, and use it to stabilize the pleating. I’ll whip stitch in place all the way around the collar or cuff, on the back side, and then carefully pad stitch through lining and the back layer of the pleating to stabilize and establish the shape desired.
Running a 2-3 quick stem stitch or chain stitch seams around the cuff and collar pleating, perpendicular to the pleating, is also a great stabilizer. If you’re not prepared to commit to colorful embellishment, the stabilizing seams can be done with white thread – even the same silk thread you used for gathering the pleats.
Construction of a High-Necked Hemd
Sew and finish the rest of the seams in the body of the hemd. Sew the gusset into the underarm, and close the arm seam and side seam, leaving 2-3″ open at the end of the arm seam. Sew the center front, leaving 8-14″ at the neck opening (Many hemde depicted in detail have deep neck openings; my assumption is to facilitate nursing an infant). Add a rolled seam finish to the cuff and neck openings, and a hem at the bottom of the hemd.
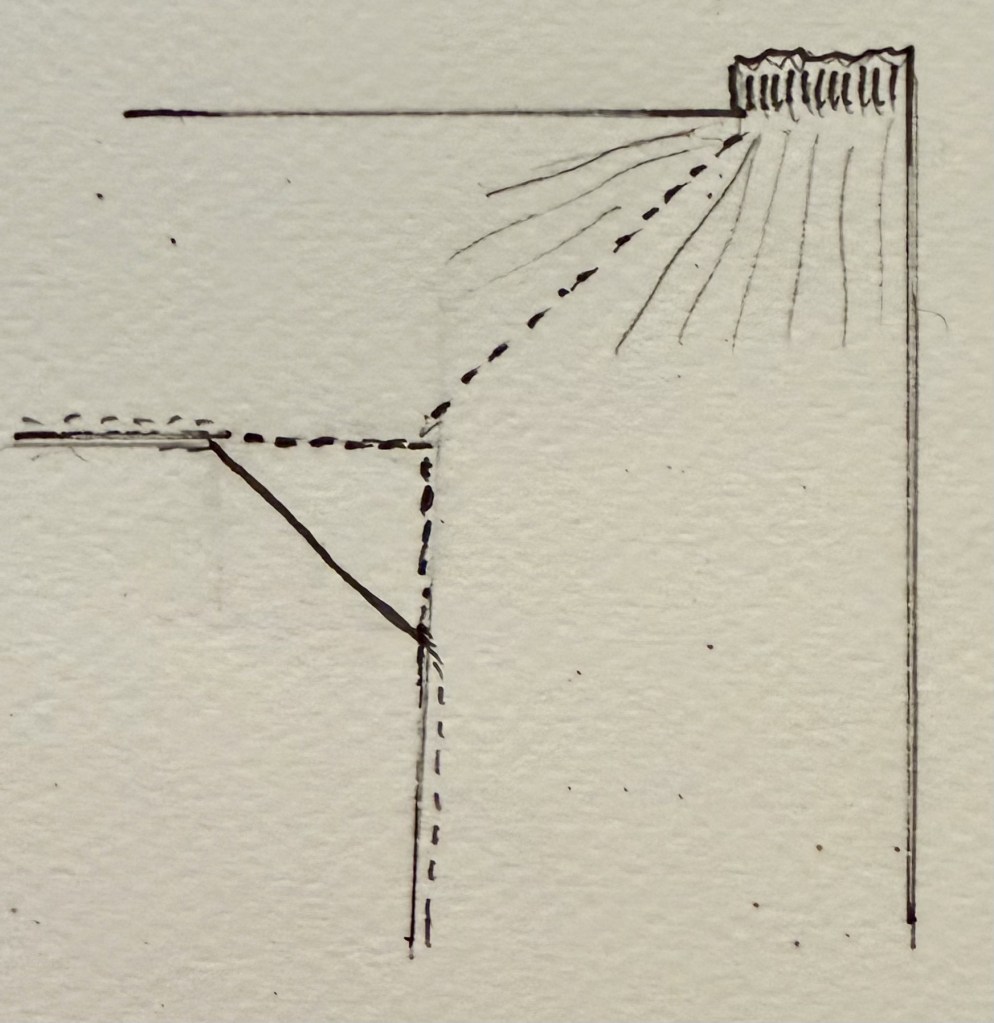
Lazy tailor’s protip – I have a serger. I love my serger because it makes my inner perfectist quite happy. I finish edges with a serger *after* I’ve run joined seams through the pleater. And I often simply serge the hem edge, without actually creating a turned hem, because the only one that will see the hem is my husband or my attendant, and they don’t care.
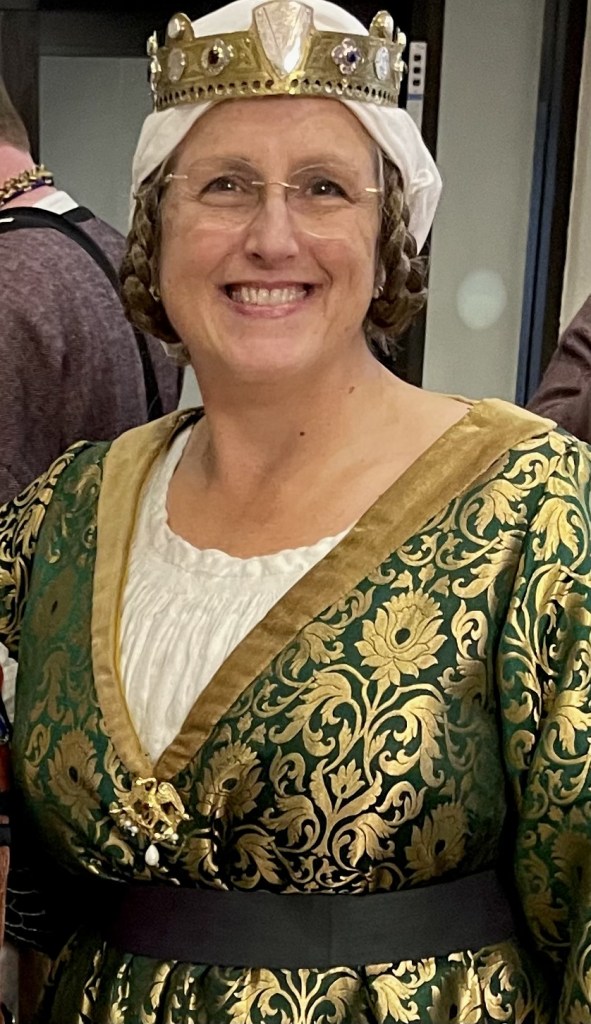
The Finished High-Necked Hemd
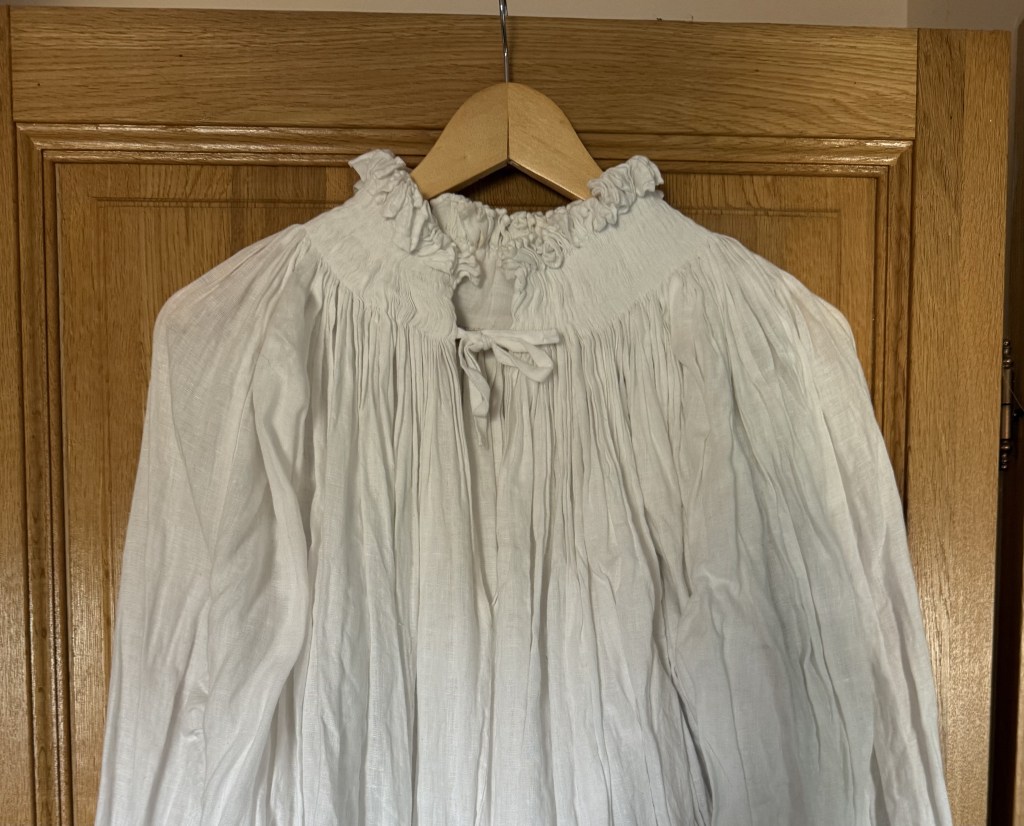
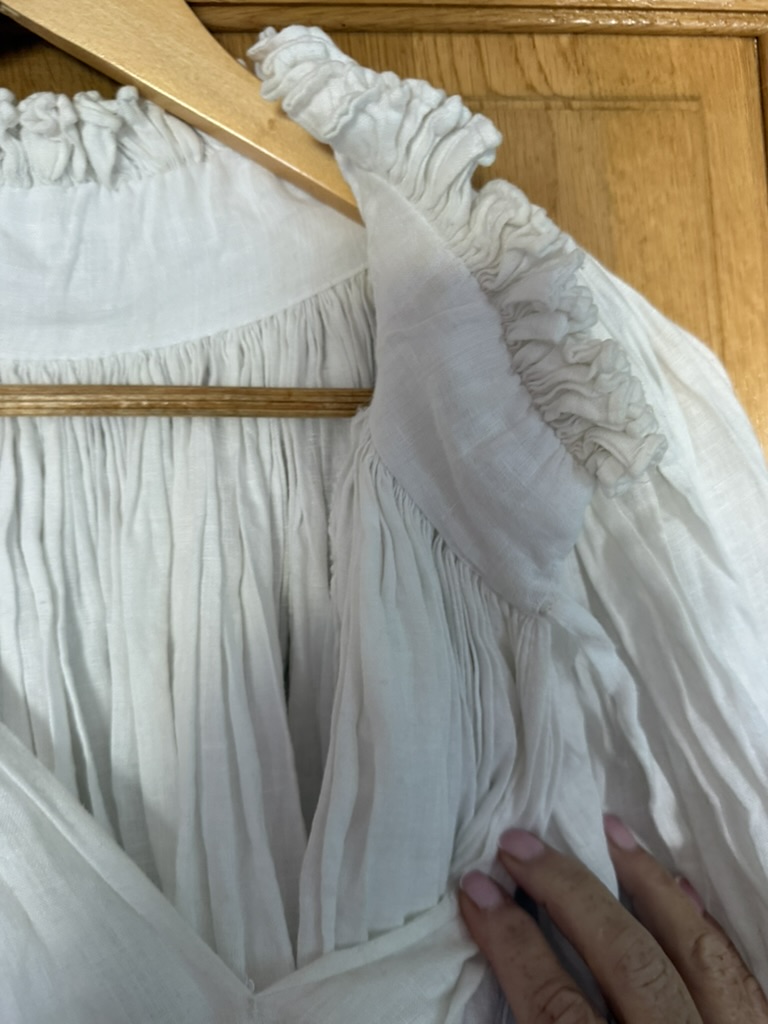
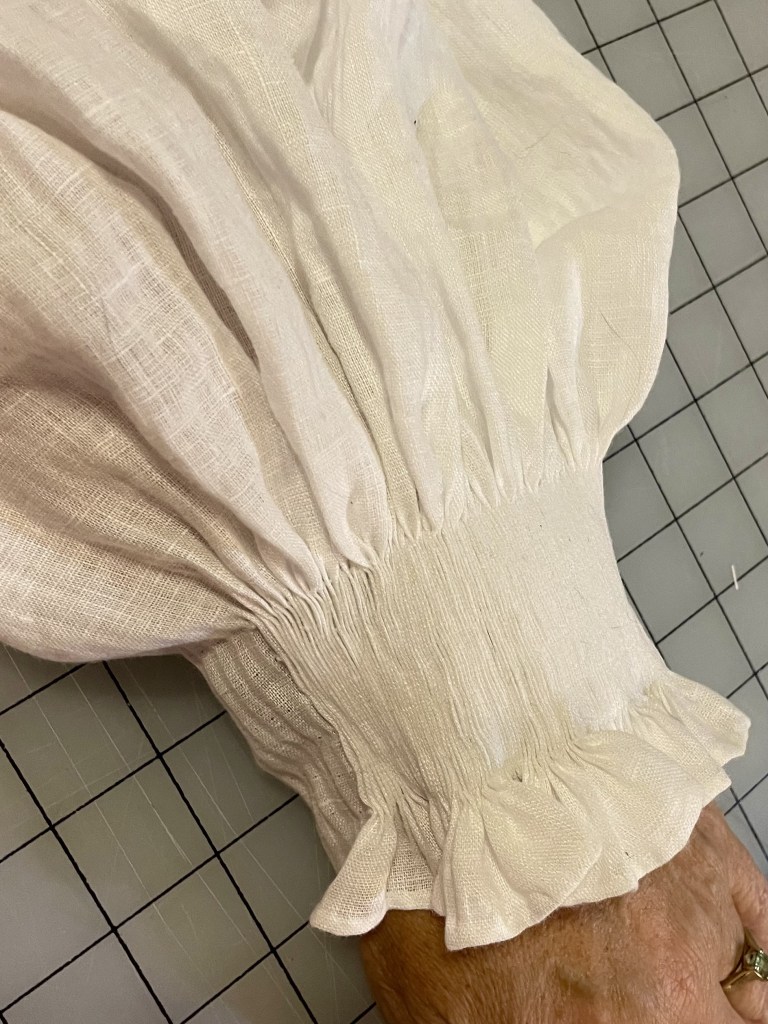
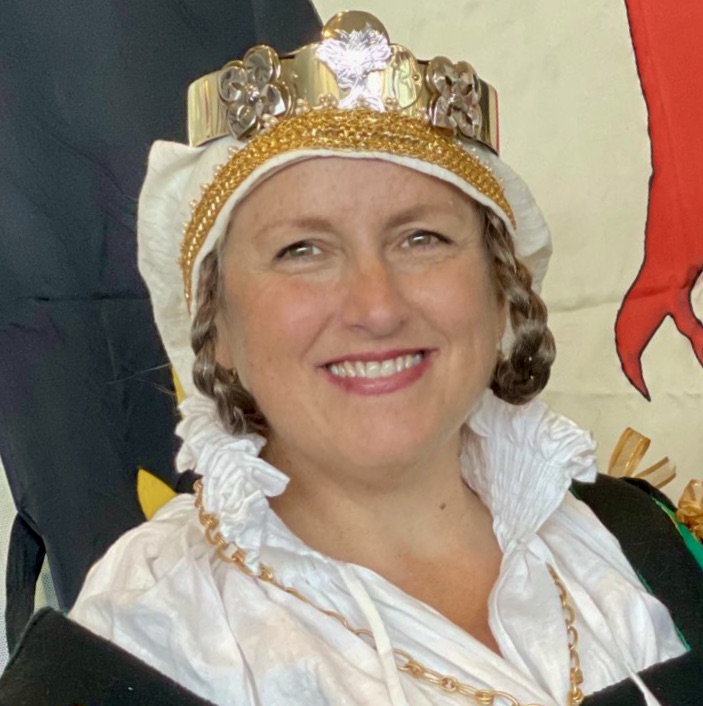
Argh – my coronet is crooked. And you can see in this photo I haven’t yet lined and stabilized the collar – but the garment was wearable and pretty!
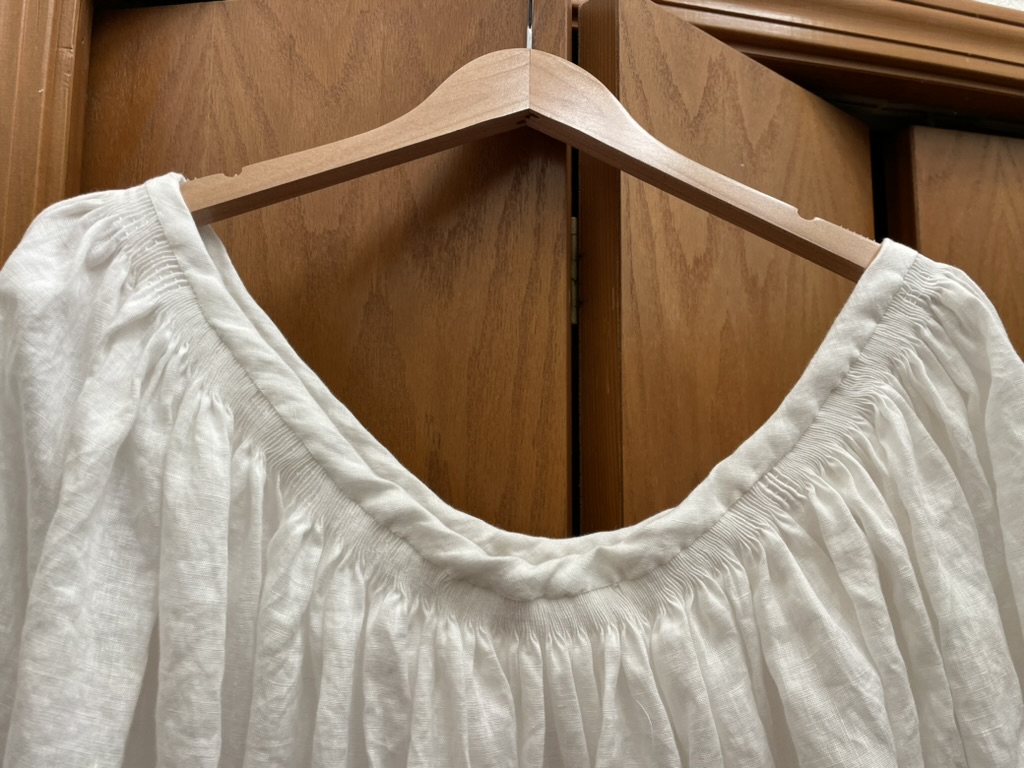
Construction of the Round-Necked Hemd
Assemble, stitch and baste down all seams that you will pleat across. Generally, for a round necked hemd, you’ll sew 7″ from the top of the garment to the underarm gusset. Minimizing bulk for seam joins is very important when running it through the smocking pleater.
Use much of the the same process as above for pleating. I chose to not do a rolled hem for this hemd, but planned to bind it with a strip of linen after smocking. I also used a narrower pleat width. The hemd below was made with 4 gathering threads spaced one slot apart, rather than the wider spacing of the high-necked hemd.
Bind the edges of your pleating to stabilize it. I chose to whipstitch 1/2″ from the edge on the outside of the garment, but cut a curved piece to roughly match the neckline curve to line 1 1/4″ deep on the inside of the garment, pad stitching in place to stabilize the smocking. I finished the cuffs similarly, but no curved piece required – just cut the binding/lining on the straight grain.
Then assemble the body of the garment. Stitch the gussets into the underarm, stitch the arms and sides closed, and hem the garment.
The Finished Round-Necked Hemd
Next Steps
I’d like to make another round-necked hemd because it’s a very versatile garment. This time I’d like to take my time, and make a run at embellishment, after the many portraits with pretty, embroidered undergarments.

