In spring of 2022, our world was hesitantly emerging from the pandemic, and the SCA was trying to figure out how to be an in-person activity again. Christopher and I submitted our letters of intent to be the 13th Baron and Baroness of Madrone, the busy Seattle area barony, oldest in the Kingdom of An Tir. The intended investiture date was our Athenaeum event, which is an A&S body of work display day event held at a large school.
We were the only candidates – which is NOT a guarantee of selection, and had it not been post-pandemic, the Crown could certainly have sent back to the barony asking to see more interest as a sign of a healthy branch. That said, when the Crown accepted our application, we decided to start on clothing, giving us about 6 weeks to put garb together.
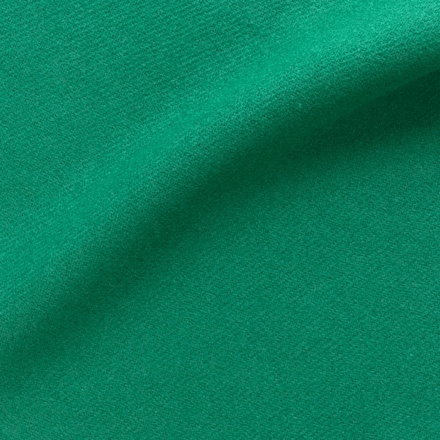
I focus on Renaissance German re-enactment in the 1450-1530 time frame. I enjoy creating trossfrau and German renaissance court dresses, so I began planning. Click here for the details of Kit’s coordinating Waffenrock outfit. My design starting point was a gorgeous piece of brilliant green wool (Holiday Green from Dorr Mills.)
Research and Discovery
I looked through many woodcut prints of trossfrau dresses. I drew a few conclusions while surveying many, many woodcut prints.
- Most dresses may have had slashed skirt guards, but most bodices had solid guards and little other embellishment. It’s generally suggested that X-shaped slashing is German, and + shaped slashing is Swiss.
- As best I could tell from woodcut prints, trossfrau dresses seem to be only two colors
- The neckline is low, and the waistline is high. I chose to modify the look with a higher, narrower back neckline because I want a secure fit over my shoulders.
- It’s not always possible to see the waistline detail, but knife pleating seemed to be most common, with possible cartridge and/or roll pleating a distant second. I prefer the silhouette of cartridge pleating, so chose that.
- Authoritative research suggests that trossfrau skirts were often cut in gore shapes for a cone shaped silhouette and flare, however, as a larger woman, achieving nice pleating at my waist measurement meant a super lengthy hem circumference (and weight), or choosing rectangular panel construction instead. Measuring and applying guards is simpler with rectangular panels, as well.
- Some trossfrau wore no sleeves over their hemd, some wore sewn-on sleeves, and very rarely, there is evidence of tie-on sleeves. I chose tie-on sleeves so I could look finished and put together for court, but remove them during hot weather and chore time.
Like the Saxon gown, I tend to think of it a bit like a paper doll assembly – pick a bodice, pick a sleeve, pick a skirt, and pull all together into a single outfit.
This bodice and cartridge pleating are from this print:

Detail from Zum Tanz gehende Ehefrau (Couple Going to a Dance), 1531, Hans Sebald Beham
I chose to recreate this skirt; I love this whole print!
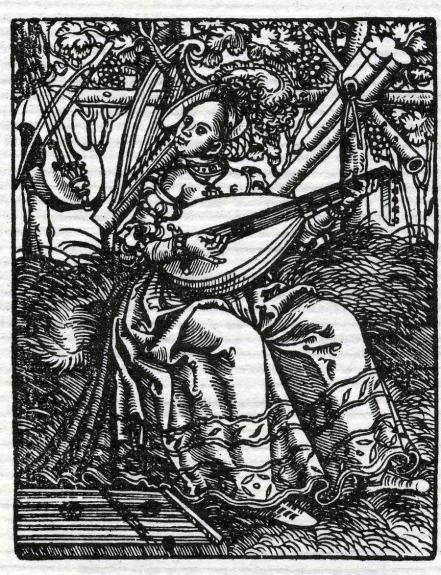
Frau Musica, Lucas Cranach the Elder, 1529
Sleeve puff and slash pattern are from this print:

Detail from Künstler: Beham, Hans Sebald Entstehungsjahr: 1512
Tie-on sleeved are from this print:

Patrician Woman from Basel, Hans Holbein, 1510
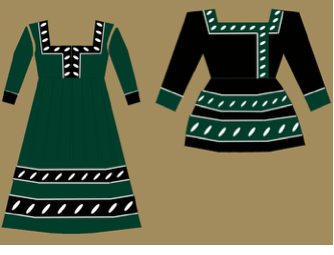
This was my initial design below – I ended up changing the slashing pattern and stripes based on surveying multiple similar garments on woodcut prints.
Construction Process
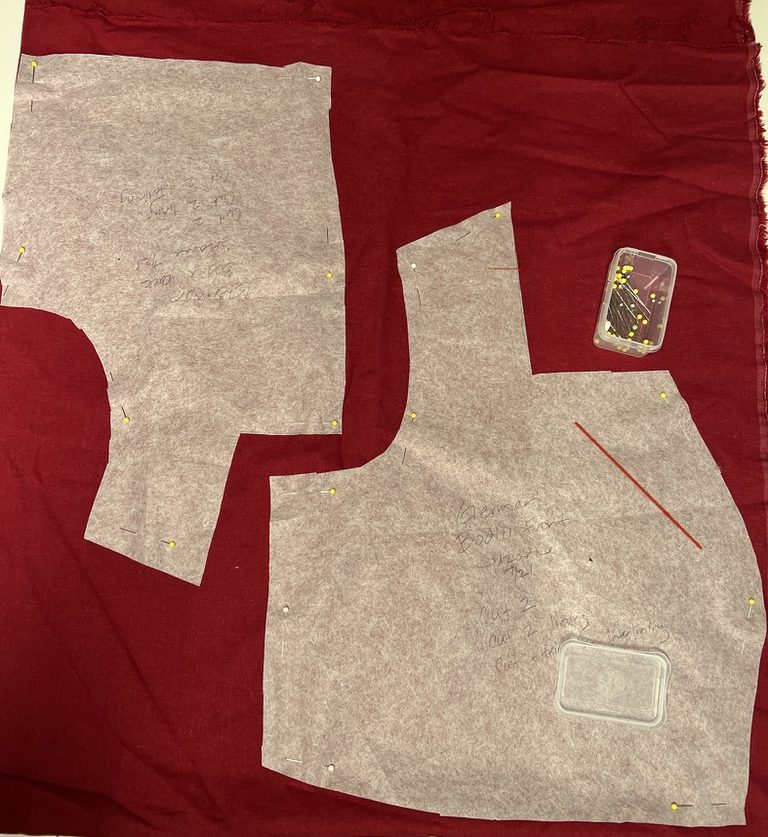
I already had a bodice and sleeve pattern drafted that fits me well and is comfortable, and the skirt is a matter of geometry.
Bodice
My bodice is generally made of three layers, linen lining, canvas interlining, and wool outer layer – plus wool guards. I made the bodice up into a finished assembly, minus the guards. I flipped the bodice over to the back side, and added ¼” grosgrain ribbon for ladder lacing. I pinned it in place, and stitched it down through all three layers every half inch. That gave me a very stable, secure base for spiral lacing the bodice.
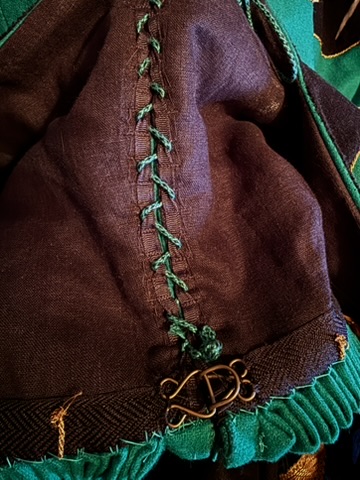
I then flipped the bodice back over and add the guards, applied over top of the ladder lacing stitches, and sewed in place with fine whip stitching. I whip stitched a stabilizing around the inside bodice of the dress to help support the weight of the skirt – bias tape, grosgrain ribbon, cotton webbing, or even an extra folded turn of canvas inside the bodice. At the very end of construction, after adding the skirt, I added a large, sturdy hook and eye at the center front waistband.
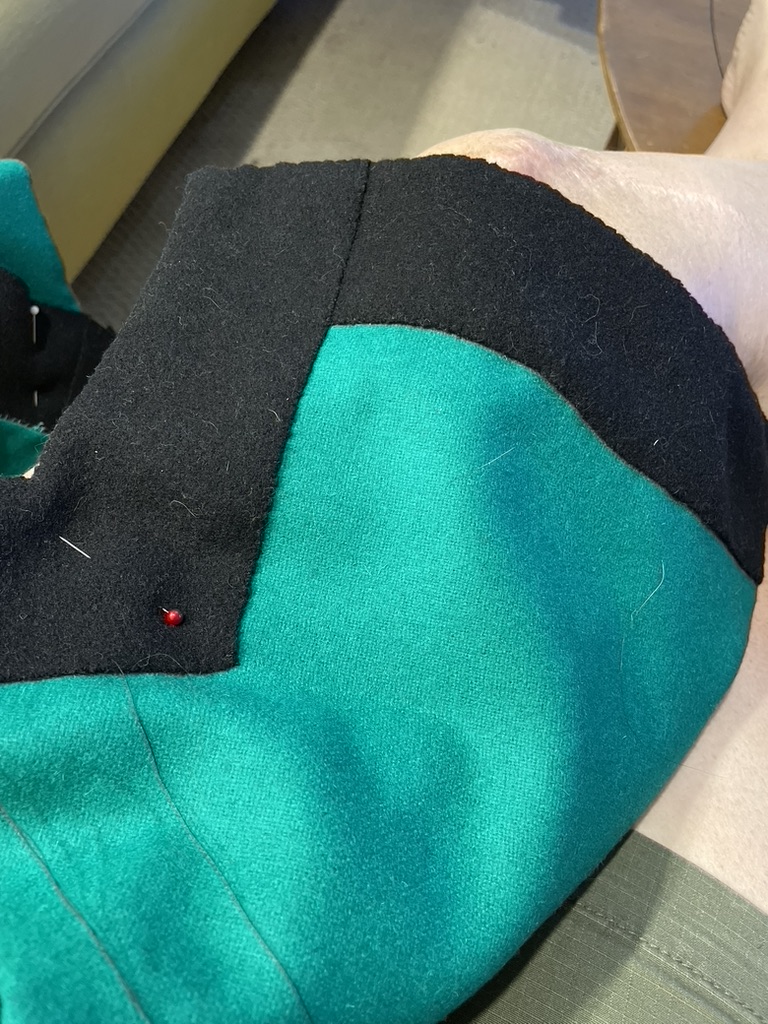
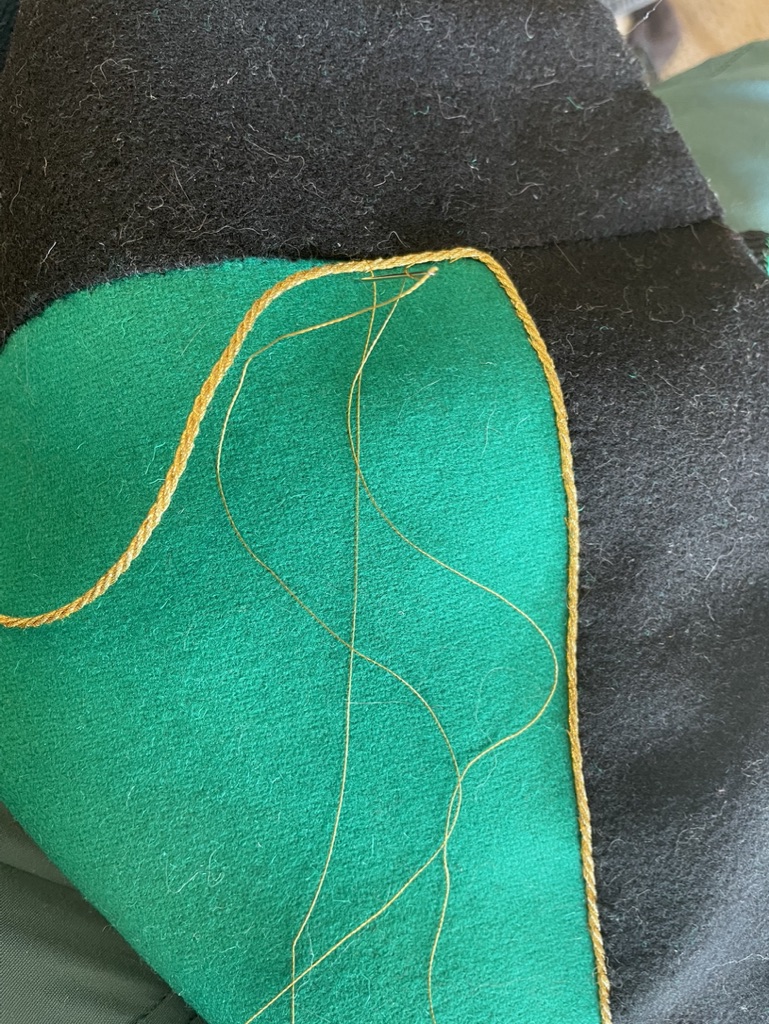
For this gown, I wanted a bit of bling for court, so I couched twisted gold metallic trim along the inside edge of the guards. This hasn’t held up super well because it’s much stiffer than the garment – I’ve had to repair it a couple of times.
Skirt
I used 4 panels of wool, 60″ selvedge to selvedge, for the skirt. I started by carefully measuring from bodice bottom to the ground, checking both front and back, and adding 1 ½” top and 1” bottom for hems. Ideally the skirt will be the same length all around, so for a significant difference in floor measurement from front to back, I would choose to adjust the bodice length slightly, rather than vary the skirt length.
I machine sewed the side seams together, leaving 6” open at the top edge of the center front, and whip stitched the selvedges down for a neat finish. I added a rolled hem to the remaining top 6” of center front.
I finished the top edge with a wide hem, which will be the basis for cartridge pleating later, turning back and pressing ½” and then 1”. I’m a giant fan of machine blind hem stitching, which I used on both top and bottom hems. I hemmed the bottom edge by turning back and pressing ½” and 3/4”.
Next up: adding the guards. I looked at a number of trossfrau skirts and guard patterns before deciding how wide, and how widely spaced, I wanted my guards. Note on the bottom guard: if it extends all the way to the floor, think through how you want to attach it. If you roll and press both layers back together, it makes for a bulky and difficult hem to sew through. I’d recommend hemming the skirt, then sewing the guard on separately.
I cut out both black wool and white linen strips for the guards, measured and marked the slashes on the black wool, and cut them out using sharp embroidery scissors. Because my guards are melton wool, I didn’t have to do any edge finishing on the slashes or long edges. A quilting ruler, rotary cutter, and cutting mat are your friend, here!
I also used the clear grid quilting ruler to mark lines for guard placement. I wanted white to show through the slashing, so I first basted the white linen strip down underneath the guards. I sewed the black strips on flat over the white linen, without turning under the long edges.
I would have preferred to whip stitch the black guards to the skirt – it gives a nicer flat lie, and looks more authentic. I will caution that when sewing guards, especially with fabric that’s at all likely to slide, pin the heck out of both edges before sewing them down. Edge creep happens easily when machine sewing guards. Since I was running out of time, I used a narrow, long stitch zigzag (a long zigzag is harder to perceive as a machine line than a straight stitch) to secure the guards in place.
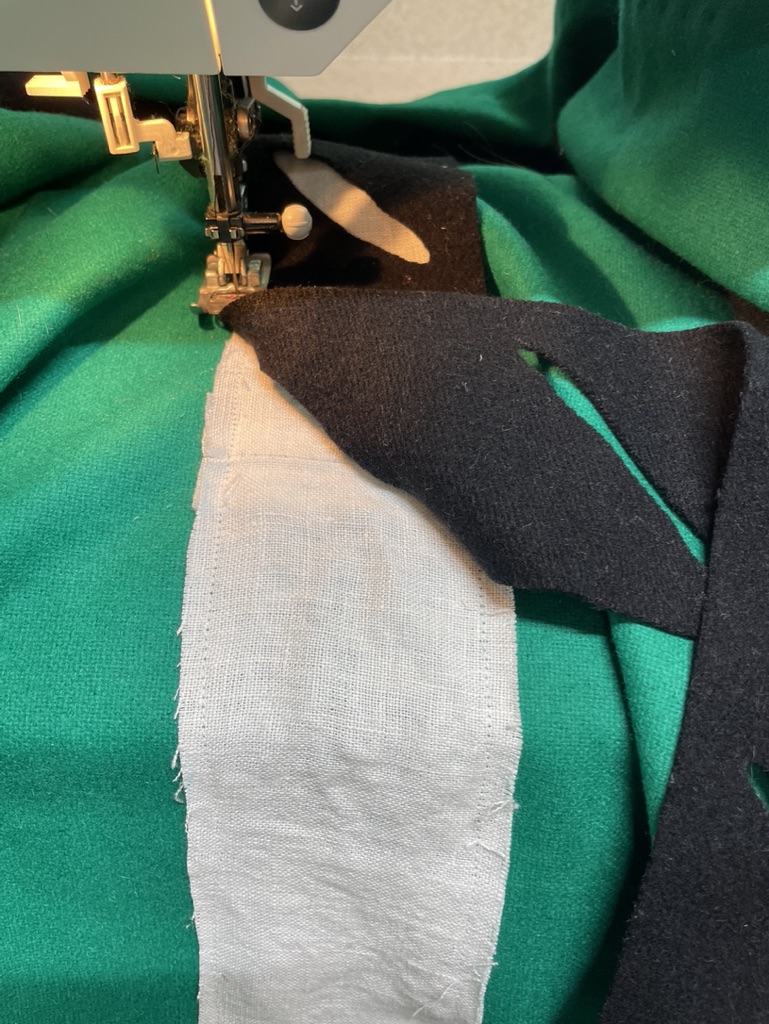
Again, I wanted bling because court dress! And also the source image seemed to have contrast edging outside the guards. I used a couching foot and similar narrow, long zigzag stitch to couch the metallic twisted gold cord down at the edge of the guards. Another bonus – the stiffness of the metallic cord helped the skirt lie and move nicely.
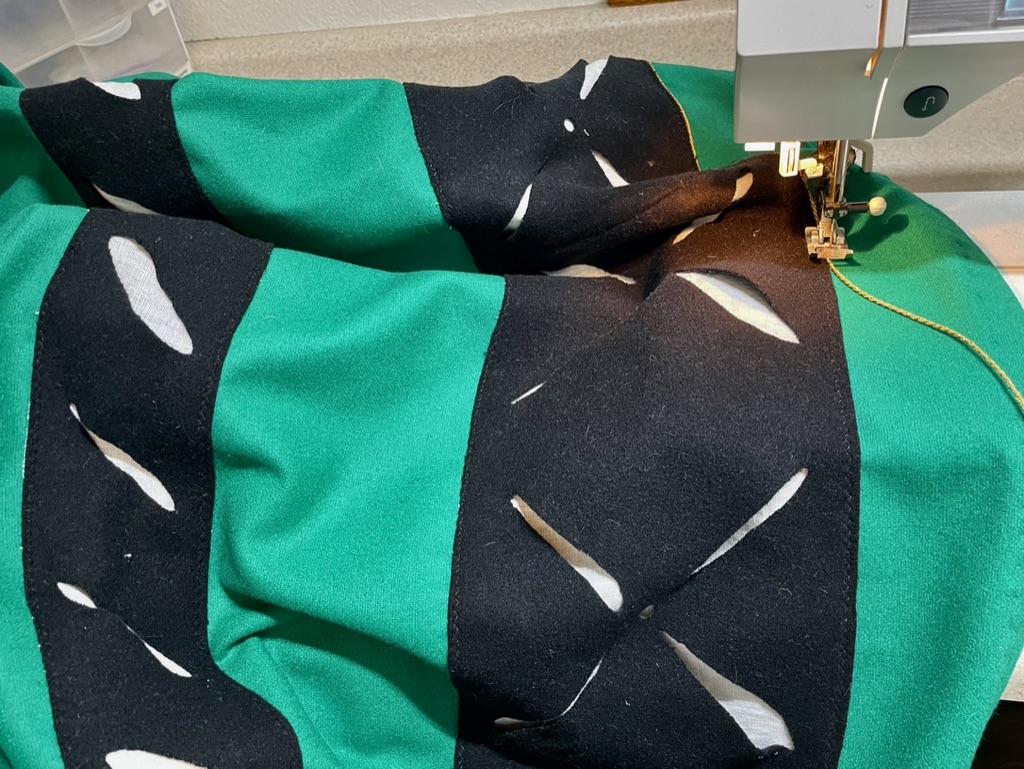
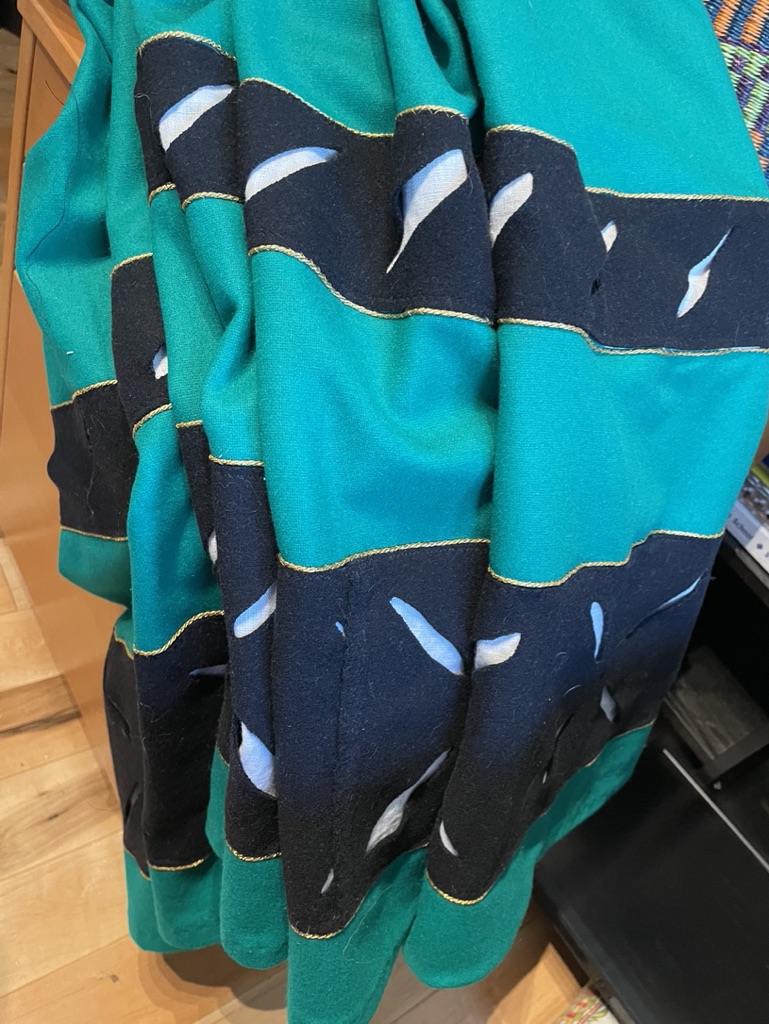
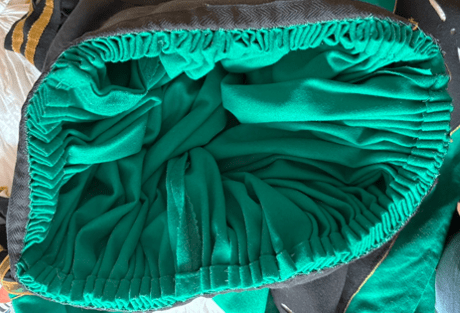
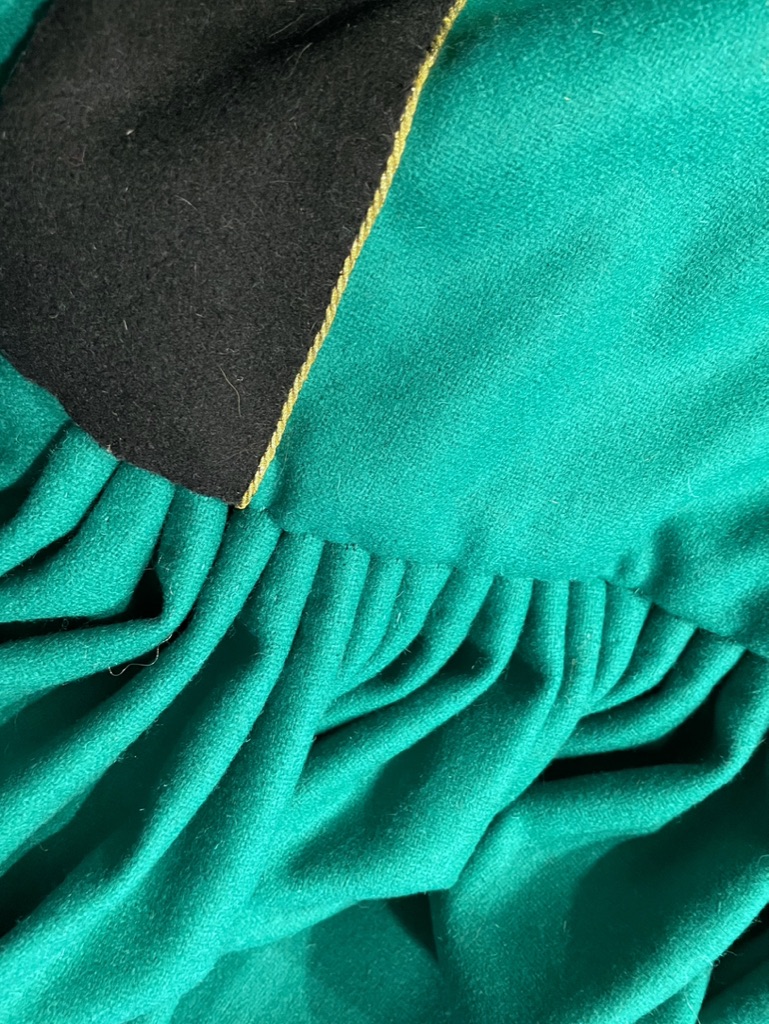
Finally, time to cartridge pleat the skirt and stitch down to the bodice. I love cartridge pleating, and I do a double pass of stitching to the bottom edge of the bodice using heavy duty silk, linen, or perle cotton thread for durability. This is a great reference on how to cartridge pleat: https://historicalsewing.com/how-to-sew-cartridge-pleats
Sleeves
Many folks who do puff and slash sleeves use a technique where they are built up on a white linen base, with each layer of puffing and slashing sewn in place. Meisterinne Genoveva has a great tutorial on that.
I had lots of help from talented friends Baroness Spike and Mistress Anissa with the sleeves! The sleeves would have been much less blingy without their encouragement.
I wanted to try something different – using panes, tape, and bands to create a sleeve in which i could pull poufs of hemd out into the paned sections. The tricky question was how to create a stable shape for the panes, without them sliding down the arm and losing their curve.
First, I cut black sleeves out with extra length in the pane section, cut the panes, and then Spike reinforced the panes by carefully stitching actual metal trim (a remnant from a vintage upholstery project) down the center.
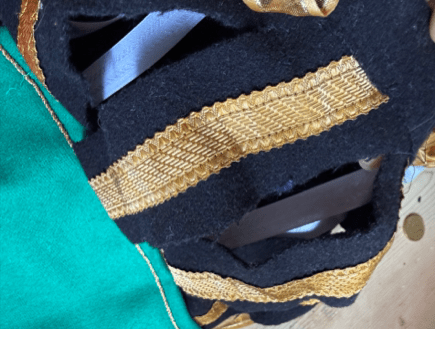
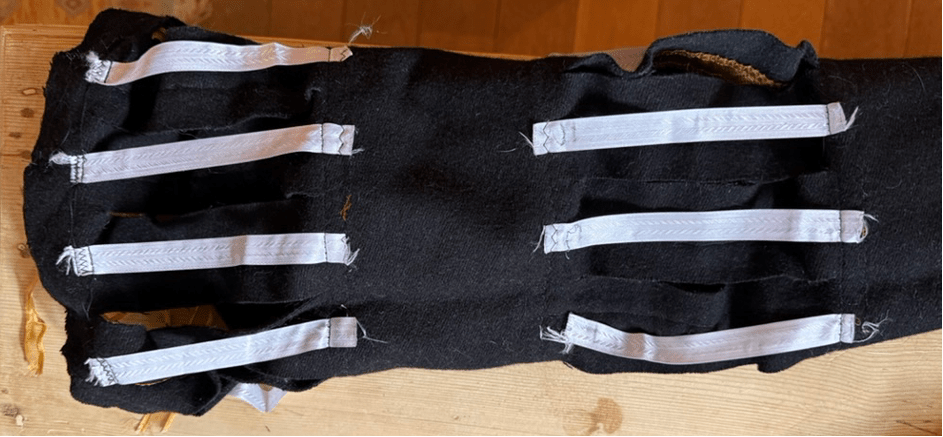
Second, I chose to secure the panes in place by sewing shorter strips of white sewing tape in place at the base of each pane, pulling and securing the panes into a curved C shape. I’m not sure this was the sturdiest solution, but it did provide the look I preferred.
Then finally, we stitched contrasting bands of green between the panes, and added more twisted gold trim to the edges.
I’m a huge fan of tie-on sleeves, allowing me to adjust for heat and comfort. I sewed 3 solid lacing rings into the top of the bodice armscye, and securely stitched 3 lengths of doubled gold ribbon to the sleeve heads. (I would have liked to add gold aiglets as well but didn’t get that far.)
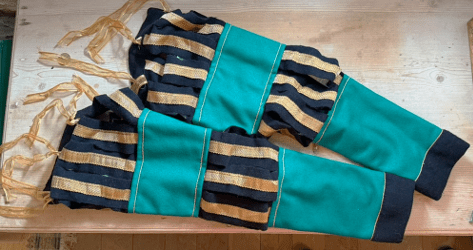
This ended up being a lovely dressy sleeve, but I didn’t adjust sufficiently for the extra layers so the sleeves were a bit stiff and snug to be comfortable. I later made a pair of plain sleeves with black cuffs as alternate sleeves, for warmth rather than bling.
Final Dress
I was very happy with the final dress – it exceeded all my expectations. It fit well, is comfortable, looks both historic and courtly, and is a garment I am still very proud of years later.
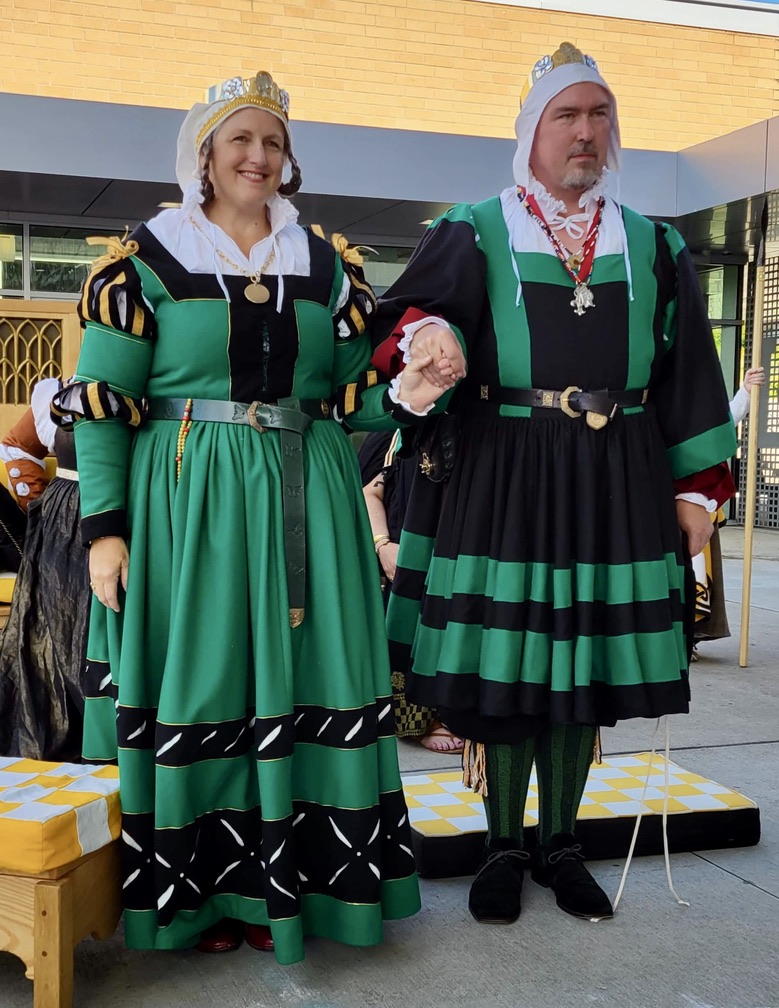
No, I don’t play the lute, but my friend and Kingdom Bardic Champion Master Gareth lent me his for this photo.
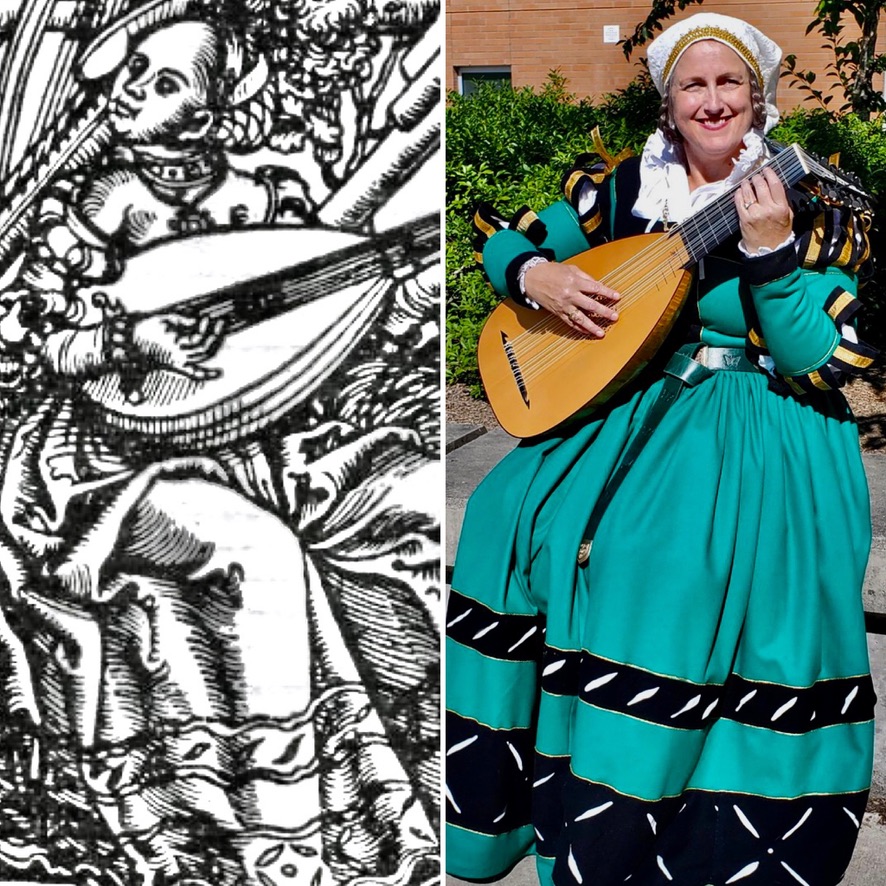
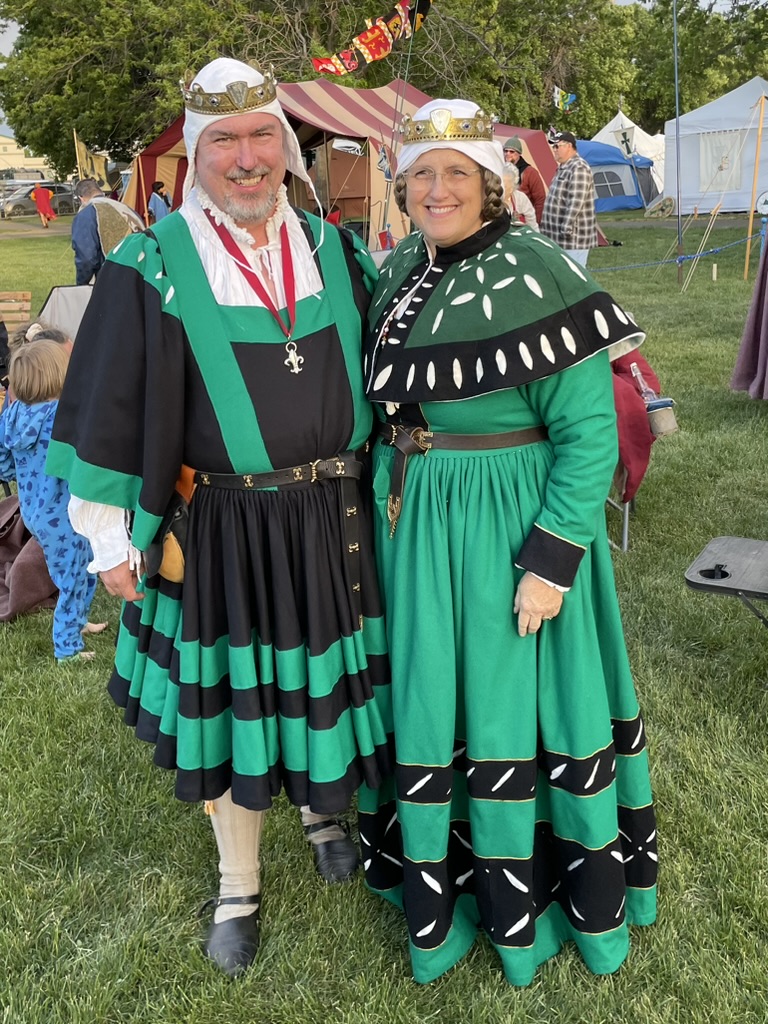
A different event a few months later, with plain sleeves. The goller is one I bought from Katarina Bejckova at CraftStoreCZ, and while the greens don’t match perfectly, it’s excellent quality and I still love the garments together.
The list of people who helped me bring this dress to completion (and Christopher’s garb) is long – apologies if I missed anyone. Many thanks to Mistress Annisa, Baroness Spike, Viscountess Kerij-e, Countess Aryana, Sheikha Zahra, HL Bianca, HL Ki, HL Isentrud, Dame Katryne, Lady Audra, Magnifica Alessandra, Dame Dearbhail, and more.
Next Steps
I don’t have a lot of constructive suggestions on this project, and I’m very happy with it. I could embroider the hemd collar and cuffs and add aiglets to the ribbon ties. I’d like to add an appropriate belt pouch and a big, floppy landsknecht hat with feathers!
Resources
Katafalk, Trossfrau Dress, https://katafalk.wordpress.com/2014/04/06/patternmaking-for-the-kampfrau-dress/
Landsknecht Woodcuts: Kriegsvolker im Zeitalter der Landsknechte, by August Breunner and Marion McNealy | May 18, 2016
Town and Country 1517 – 1550: Scenes of Everyday Life in Detail from Geisberg’s German Single Sheet Woodcuts (Selections from Geisberg’s German woodcuts), by Marion McNealy and Max Geisberg | Oct 26, 2021

